Recovering Data from an Accidentally Formatted PC Hard Drive
One of the most common data loss scenarios for a Windows user happens when a PC hard drive is accidentally reformatted. This is a common mistake because when Windows is not recognizing a drive properly, a pop-up will notify you that the drive needs to be formatted before it can be used.
It can also happen if a drive is reformatted when upgrading to a new operating system. If you are a Windows user and have lost data as a result of accidental reformatting, this post will teach you about how Data Rescue Windows can be used to recover formatted hard drives.
Things to Know Before Recovery
Modern hard drives use something called a file system to logically control and organize the way data is read and written to your storage device. It essentially acts as the directory for file and folder names that tells your computer where the contents of a file are located on your hard drive. When a hard drive is formatted, this file system is re-written, meaning the file names are no longer linked to the actual content of your files on your hard drive, and all areas on your hard drive are considered to be available free space.
The good news is that your files are not actually lost in this process. Using software such as Data Rescue Windows, you can scan the entire drive to search for file patterns, and your files can be reconstructed if they have not yet been overwritten.
The first step in any data recovery scenario should be to minimize or eliminate the use of the computer or hard drive until you are able to use data recovery software. As you can recall from earlier, the locations of your old files on your hard drive are now considered to be available free space, so you will want to minimize the amount of new data being written to your device to prevent your lost files from being overwritten before recovery.
This means that if you have an accidentally reformatted external hard drive, you will want to either disconnect the device entirely or ensure you do not save new files to the device. For an internal drive (that is not so easily disconnected), minimize your usage of the computer when possible, since activities as simple as web browsing or audio/video streaming can save temporary files to your computer.
Downloading, Installing, and Activating Data Rescue Windows
Depending on what drive you have reformatted, there are a couple of ways the software can be used:
- If you have accidentally formatted an external drive for Windows, you can simply download and install the Data Rescue software to your computer as a normal application, and scan the external drive with the software.
- If you have reformatted your internal drive and reinstalled Windows, you can still download and install the software as described above, however you will need to set a temporary storage location on an external device that Data Rescue can use to store temporary scan files, preventing files on the internal drive from being overwritten.
Since there is a possibility that some of your files may be damaged or overwritten after a drive is accidentally reformatted, you will first want to try the demo version, as this has the same scan engine as the full version of the software, and has a built in preview feature that allows you to open and play any file listed in the scan results. This will help you determine if your files are damaged or corrupted, or if they can be successfully recovered using the full version of Data Rescue Windows.
To download the demo of Data Rescue Windows, visit our Downloads Page and select Data Rescue 5 Windows (requires Windows 7 or later, for earlier versions of Windows you can use Data Rescue PC 3).
Next, enter your email address and click the Download button. You will be sent an email to the provided address that contains a link to download the Data Rescue application, and your Demo Version Serial Number. You can copy this serial number so that it can be pasted directly into the software activation window.
After clicking on the download link in your email and running the downloaded file, you will be presented with the following screen:

The setup will ask where you would like to install the software, by default this will be in your Program Files folder. After selecting your install location, press “Next” to continue with the installation.
The next screen will give you the option to create a desktop shortcut for the software. Press “Next” after making your selection.
The software will begin installing to your computer, after which you will be presented with the following screen with a checkbox option to launch the software. Keep this checked or, if you’d like to perform your recovery later, you can launch Data Rescue from its install directory you selected above:
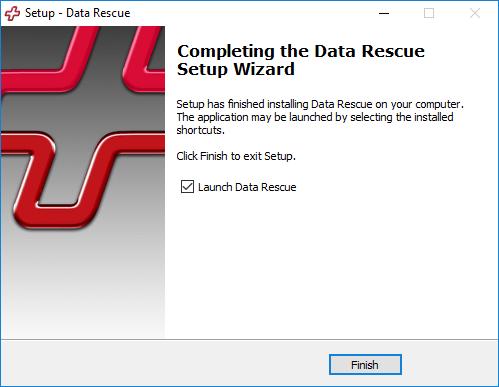
Click “Finish” to launch the software.
With the software open, you will be presented with the software License Agreement. Press “Agree” to continue to the Registration window shown below, where you can paste your Demo Serial Number (or Full Version Serial Number if you have already purchased the software):
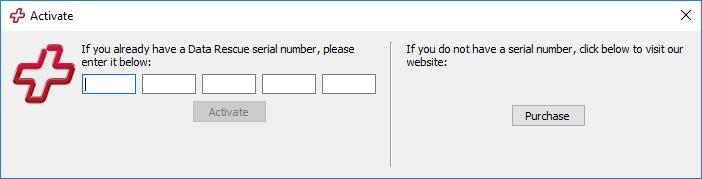
Press the “Activate” button after entering your serial number to proceed to the software as described in the sections below.
Scanning a Formatted Drive Using Data Rescue Windows
Upon launching Data Rescue Windows and activating the software, you will be taken to the Welcome screen pictured below, which allows you to choose from a few different options:
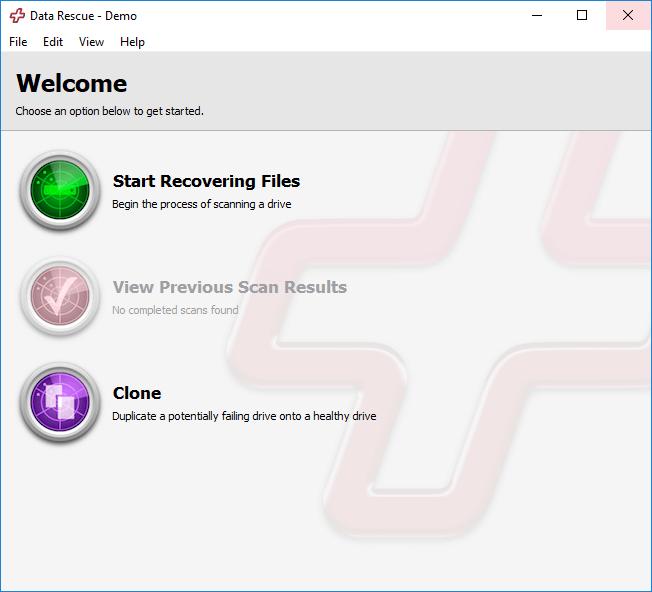
To begin the recovery process for your formatted device, select “Start Recovering Files”. You will be taken to the Scan Source screen shown below:
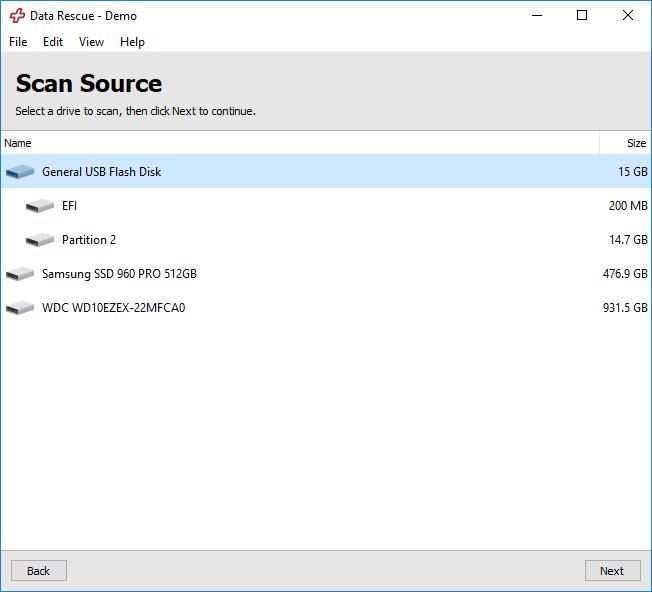
Select the Physical Hardware name of the accidentally formatted drive from the Source list.
A Physical Name will be listed as the top level of the device, whereas a Partition will be slightly indented below the Physical Name. For recovering from a formatted device, you will need to select the Physical Name.
In the above example, we will be scanning the highlighted General USB Flash Disk, a USB drive that contained a collection of image, video, and audio files before being formatted using Windows built in format utility.
Once you have selected your accidentally formatted drive, press the “Next” button to continue to the following screen:
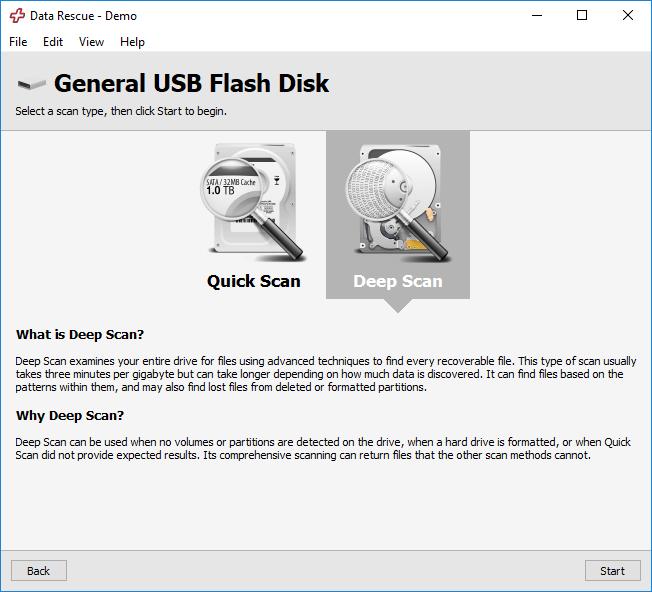
This screen will allow you to choose your scan type. For a reformatted drive, you will need to perform a Deep Scan, which will search the raw data on the device based on known file patterns.
After confirming your selection, press “Start” to begin scanning the reformatted hard drive. The actual scan can take some time to complete, even up to 5-8 hours per 1TB being scanned, as long as the drive being scanned is not damaged in any way.
Previewing Scan Results for a Formatted Drive
The Scan Results screen for the example USB drive is shown below. Your screen may look slightly different depending on the type of files that were previously stored on the device before it was accidentally formatted:
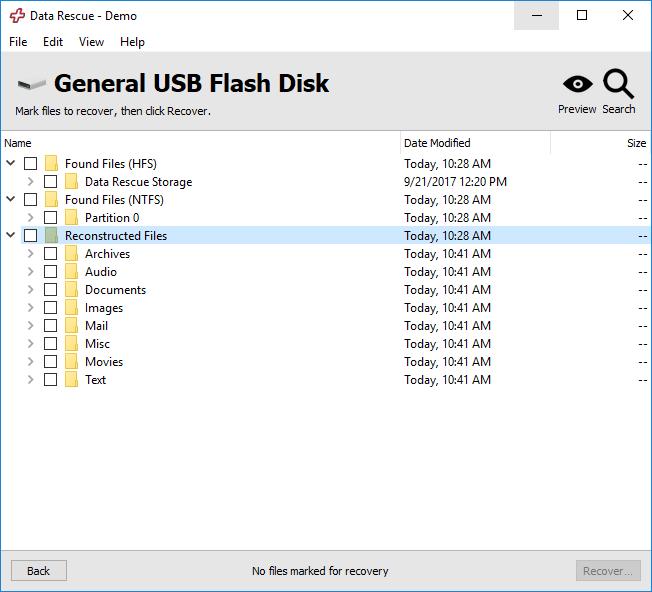
For a reformatted device, you will want to look in the Reconstructed Files folder. As you can see in the above image, the raw contents of files are grouped by file category. This is done because files lost when formatting a hard drive are no longer associated with their file or folder names (as described in the first section of this post).
The files will be given generic names, and grouped by File Extension in their respective folders. You will then have to preview or open the files for the file type you are looking for so that you can verify the contents of a file and identify it.
Below you can see the scan results screen further expanded to show the JPEG subfolder in the Images directory. As you’ll recall from the example, this USB contained images, videos, and audio before being accidentally formatted:
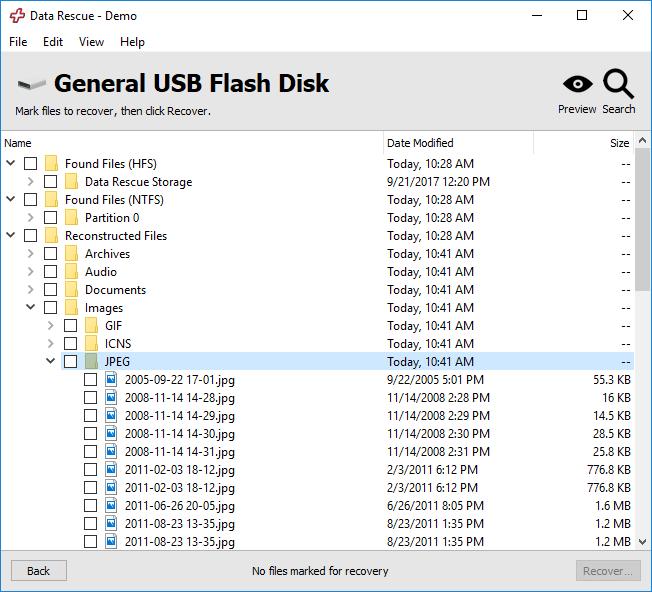
From the results shown above, it looks like the software was able to identify file patterns for a number of .jpg image files (and there are more than pictured here when scrolled down). To verify that these are the correct files, we can select an individual file and preview its contents.
To preview an individual file, highlight the file and click the Preview button in the upper right of the software window.
Make sure you preview as many files as possible to identify them and make sure they were not damaged when the device was accidentally formatted.
Marking Files for Recovery with Data Rescue Windows
To mark or unmark a file for Recovery, press the Space key with a file highlighted, or click the checkbox to the left of the file. You can also mark entire folders from the directory list to check all contained files.
In the example below where we have selected the MP3 subfolder from the Audio folder, the JPEG and PNG subfolders from the Images folder, and the MP4 subfolder form the Movies folder. This means that all files contained by those subfolders have been selected for recovery from the formatted device:
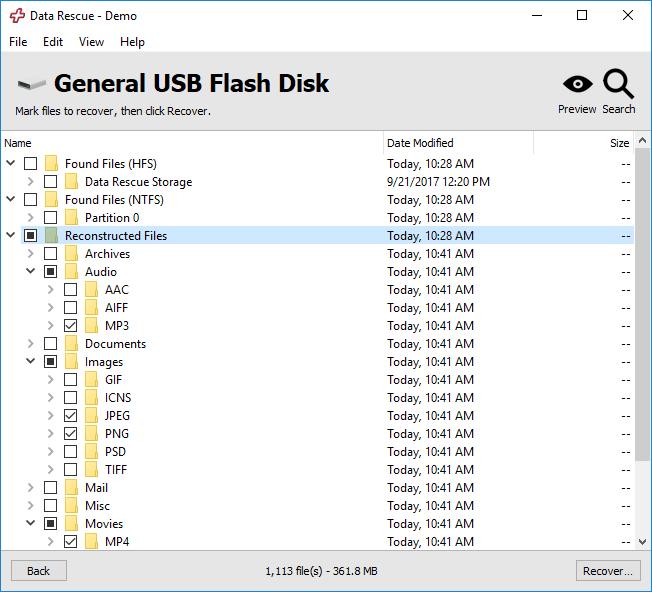
You can see the total number of files, and the total amount of data selected at the bottom of the window, to ensure you have enough room on your destination to recover the marked files.
With all the lost audio, image, and video files verified with preview and marked, we are now ready to recover the files from the reformatted hard drive.
Recovering Formatted Files Using Data Rescue Windows
At this point we have previewed scan results to make sure the files are intact, and marked the files we’d like to recover. If you have not reached this point or had trouble with any of the previous steps, feel free to review previous sections or contact our support team.
With the files marked that you’d like to recover, press the “Recover” button in the bottom right of the Data Rescue window. If you are using the Demo Version you will receive the following prompt:
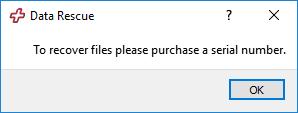
Clicking on the OK button will take you to the Activate window you saw when first running the software, where you can enter your purchased serial number. If you have not yet purchased the software, press “Purchase” to go to our Website, where the software can be purchased to recover the files you have identified and marked. You can also access the activation window by going to Help → Activate.
Once the Full Version of Data Rescue Windows is activated, you can then press “Recover” to be taken to the window where you will select a destination drive/folder for your recovered files:
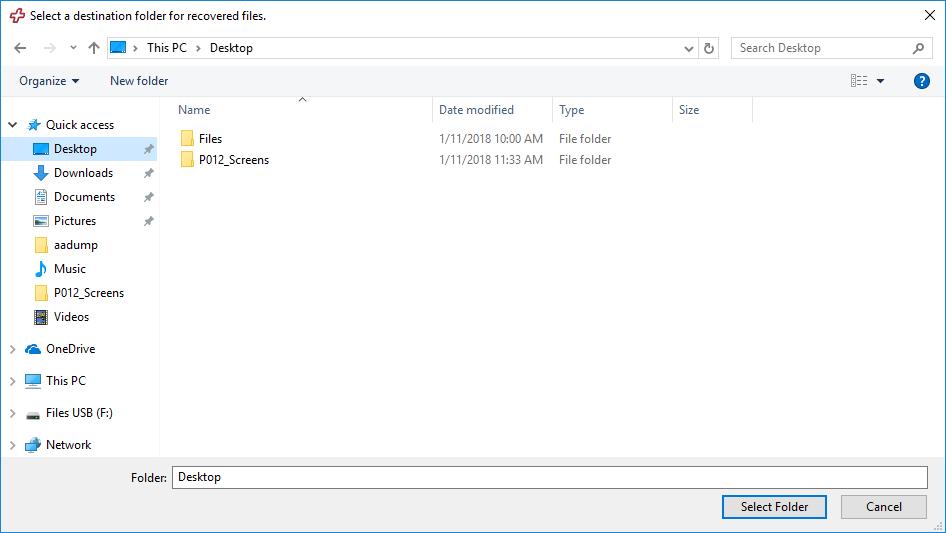
From this window, you can select where you would like to recover the files to. In our example, we are saving the files to the desktop since we scanned an external USB drive.
You can select any location, as long as it is not on the same accidentally formatted drive that you have scanned for recovery. You could potentially overwrite files that still need to be recovered, so Data Rescue Windows never allows you to write to a Source drive.
After selecting a destination location, press the “Select Folder” button and your recovery will begin.
Once the recovery is complete, you will be returned to the scan results screen, so that you can recover other files if needed.
You have now successfully recovered your files from an accidentally formatted hard drive!
To access the files, simply navigate to the hard drive or folder you selected as your destination. From here you can open, rename, and organize files as needed. Once you have confirmed that you have recovered all data from the formatted drive, we recommend making a backup of the recovered data. You can then use the accidentally formatted drive again once the files have been safely recovered, allowing the old files to be overwritten naturally.