How to Create a Bootable External Hard Drive on Mac - Update 2024

There are many reasons why someone should have a bootable external hard drive handy. A few of them are when you have a system failure and are getting Apple's infamous flashing folder with a question mark. Deleted data on your main drive and you do not want to overwrite it. You found software that you want to try, however, you are still determining if the software is safe to run on your primary system, and many more.
This instructional guide will provide the needed information to create a bootable external hard drive on Mac. This guide will show you how to create a bootable drive using the Ventura installer, however, this same process can be used if you are running Sonoma, Monterey, Big Sur, Catalina, Mojave, and so on.
You will first begin by downloading the same version of macOS that you are currently running or newer if you want to test the latest versions of macOS before upgrading. However, you can only install a newer version of macOS if your computer's hardware can support it.
Which computers can use the latest macOS versions?
You can view your current system's version of macOS by clicking on the Apple drop-down menu (located at the top left of your screen) and selecting the About This Mac menu option.
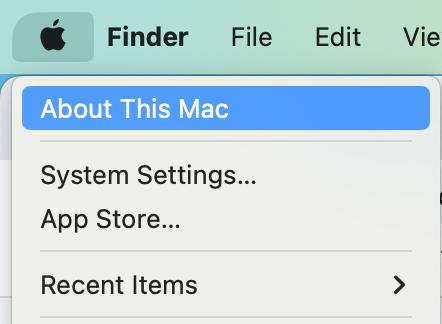
In this new pop-up, the last listed item “macOS” will inform you of your current version of macOS installed.

Now that we know the version of macOS we have installed we can begin the installation of macOS onto an external hard drive. Download the version of macOS needed via the links below.
- macOS 14 Sonoma
- macOS 13 Ventura
- macOS 12 Monterey
- macOS 11 Big Sur
- macOS 10.15 Catalina
- macOS 10.14 Mojave
- macOS 10.13 High Sierra
- macOS 10.12 Sierra
You will need an external hard drive with at least 64GB of memory. You can get by with smaller drives (16GB+), however, 64GB is a safe place if you plan on installing apps and will have additional data on it.
Here are a few thumb drive options for your external boot drive if you don't have a spare.
External Boot Drive Options:
Need something bigger?
Something bigger with a high transfer rate?
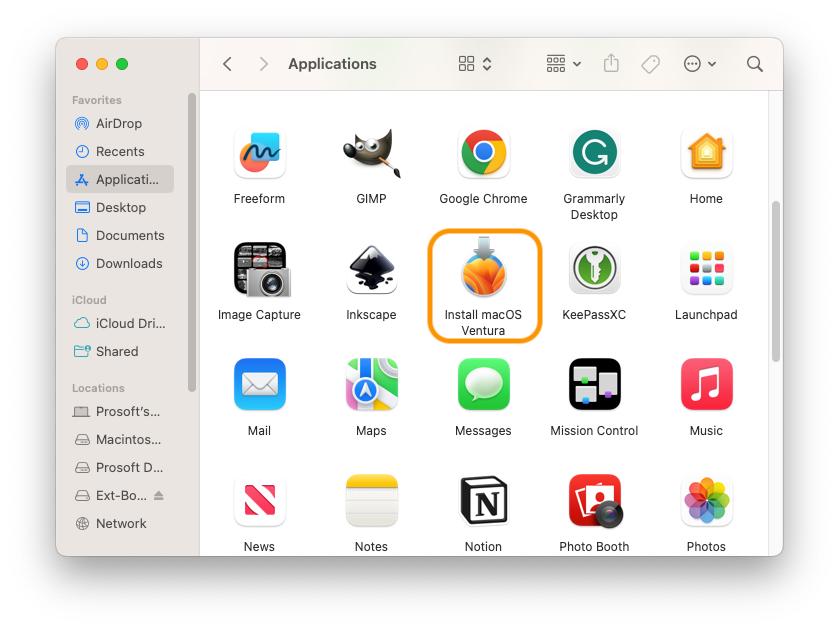
Now that we have our installer downloaded and our desired external drive ready to go. Open up the macOS installer which will be located in your Finders Applications folder. The file will be called “Install macOS Ventura”.
You will want to follow through the installer prompts until you get to the installation location. It is very crucial that we select the correct installation location as it will reformat the drive and start installing all the required macOS files.
You may only see your internal start-up drive as an install location, however, you can select “View All Disk...” to view all the possible drive selection options.
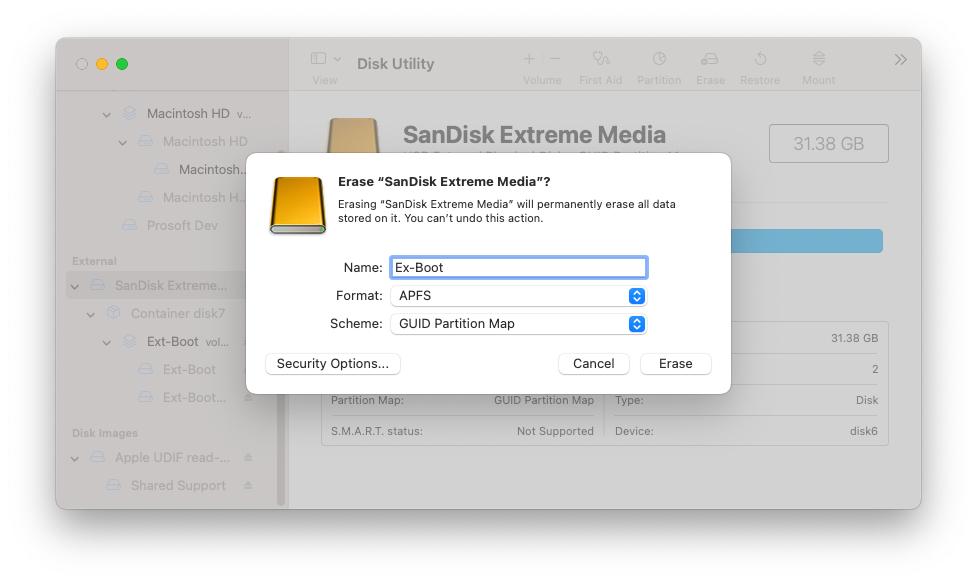
If the drive you want to install macOS onto is greyed out. It could be for a few reasons, the most common reason is that the drive is not big enough (get a larger drive). The drive has an unsupported partition scheme or is not formatted to APFS. If the latter is the issue reformatting (Erase) the drive within Disk Utility with the Format set to “APFS” and Scheme to “GUID Partition Map” will allow you to select it as an install location in the macOS installer.
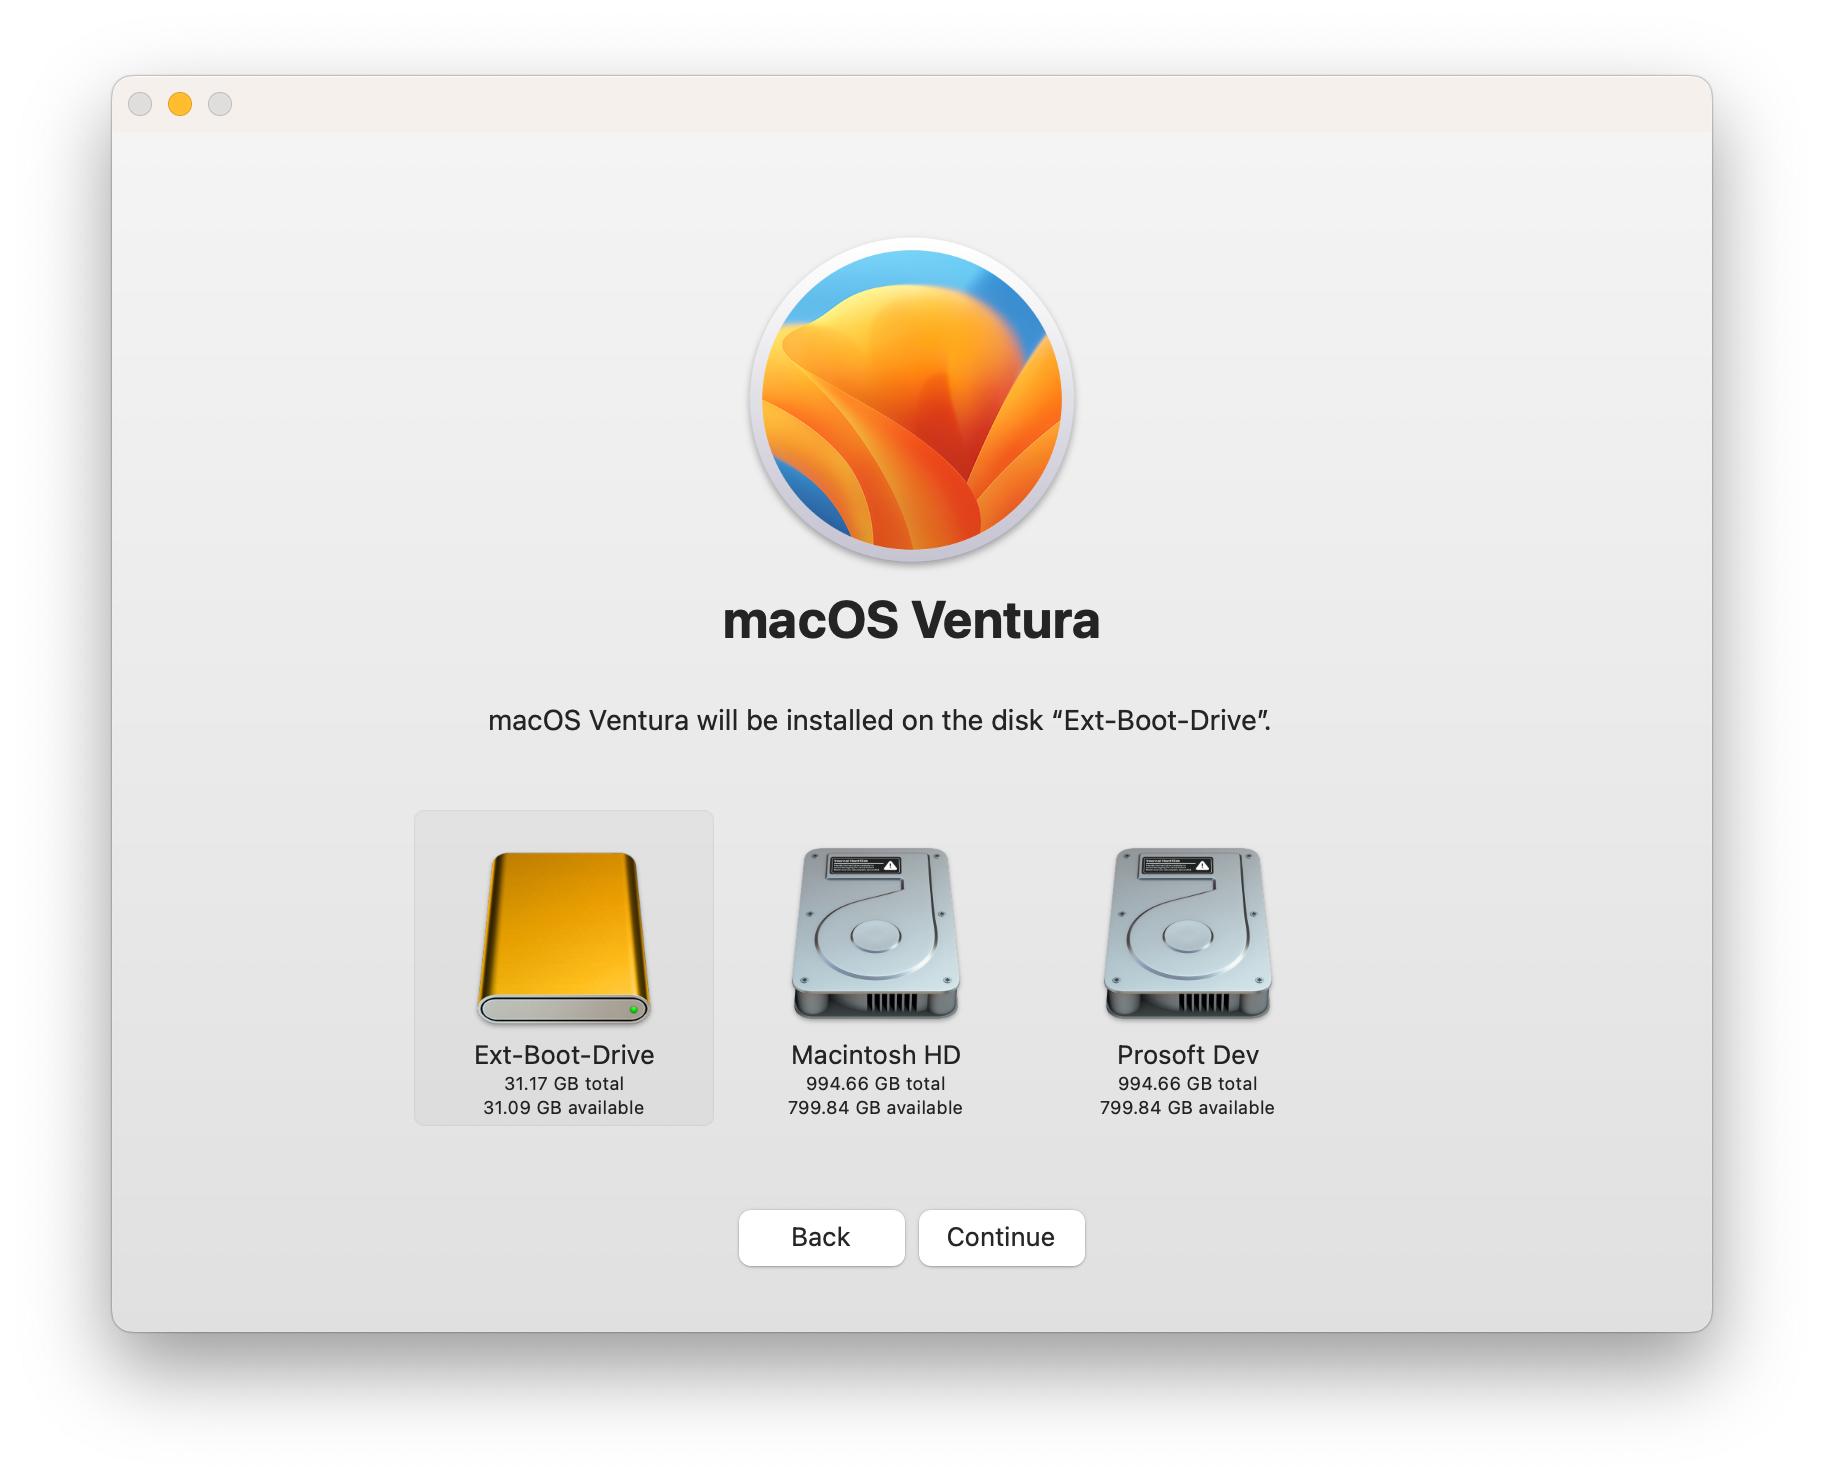
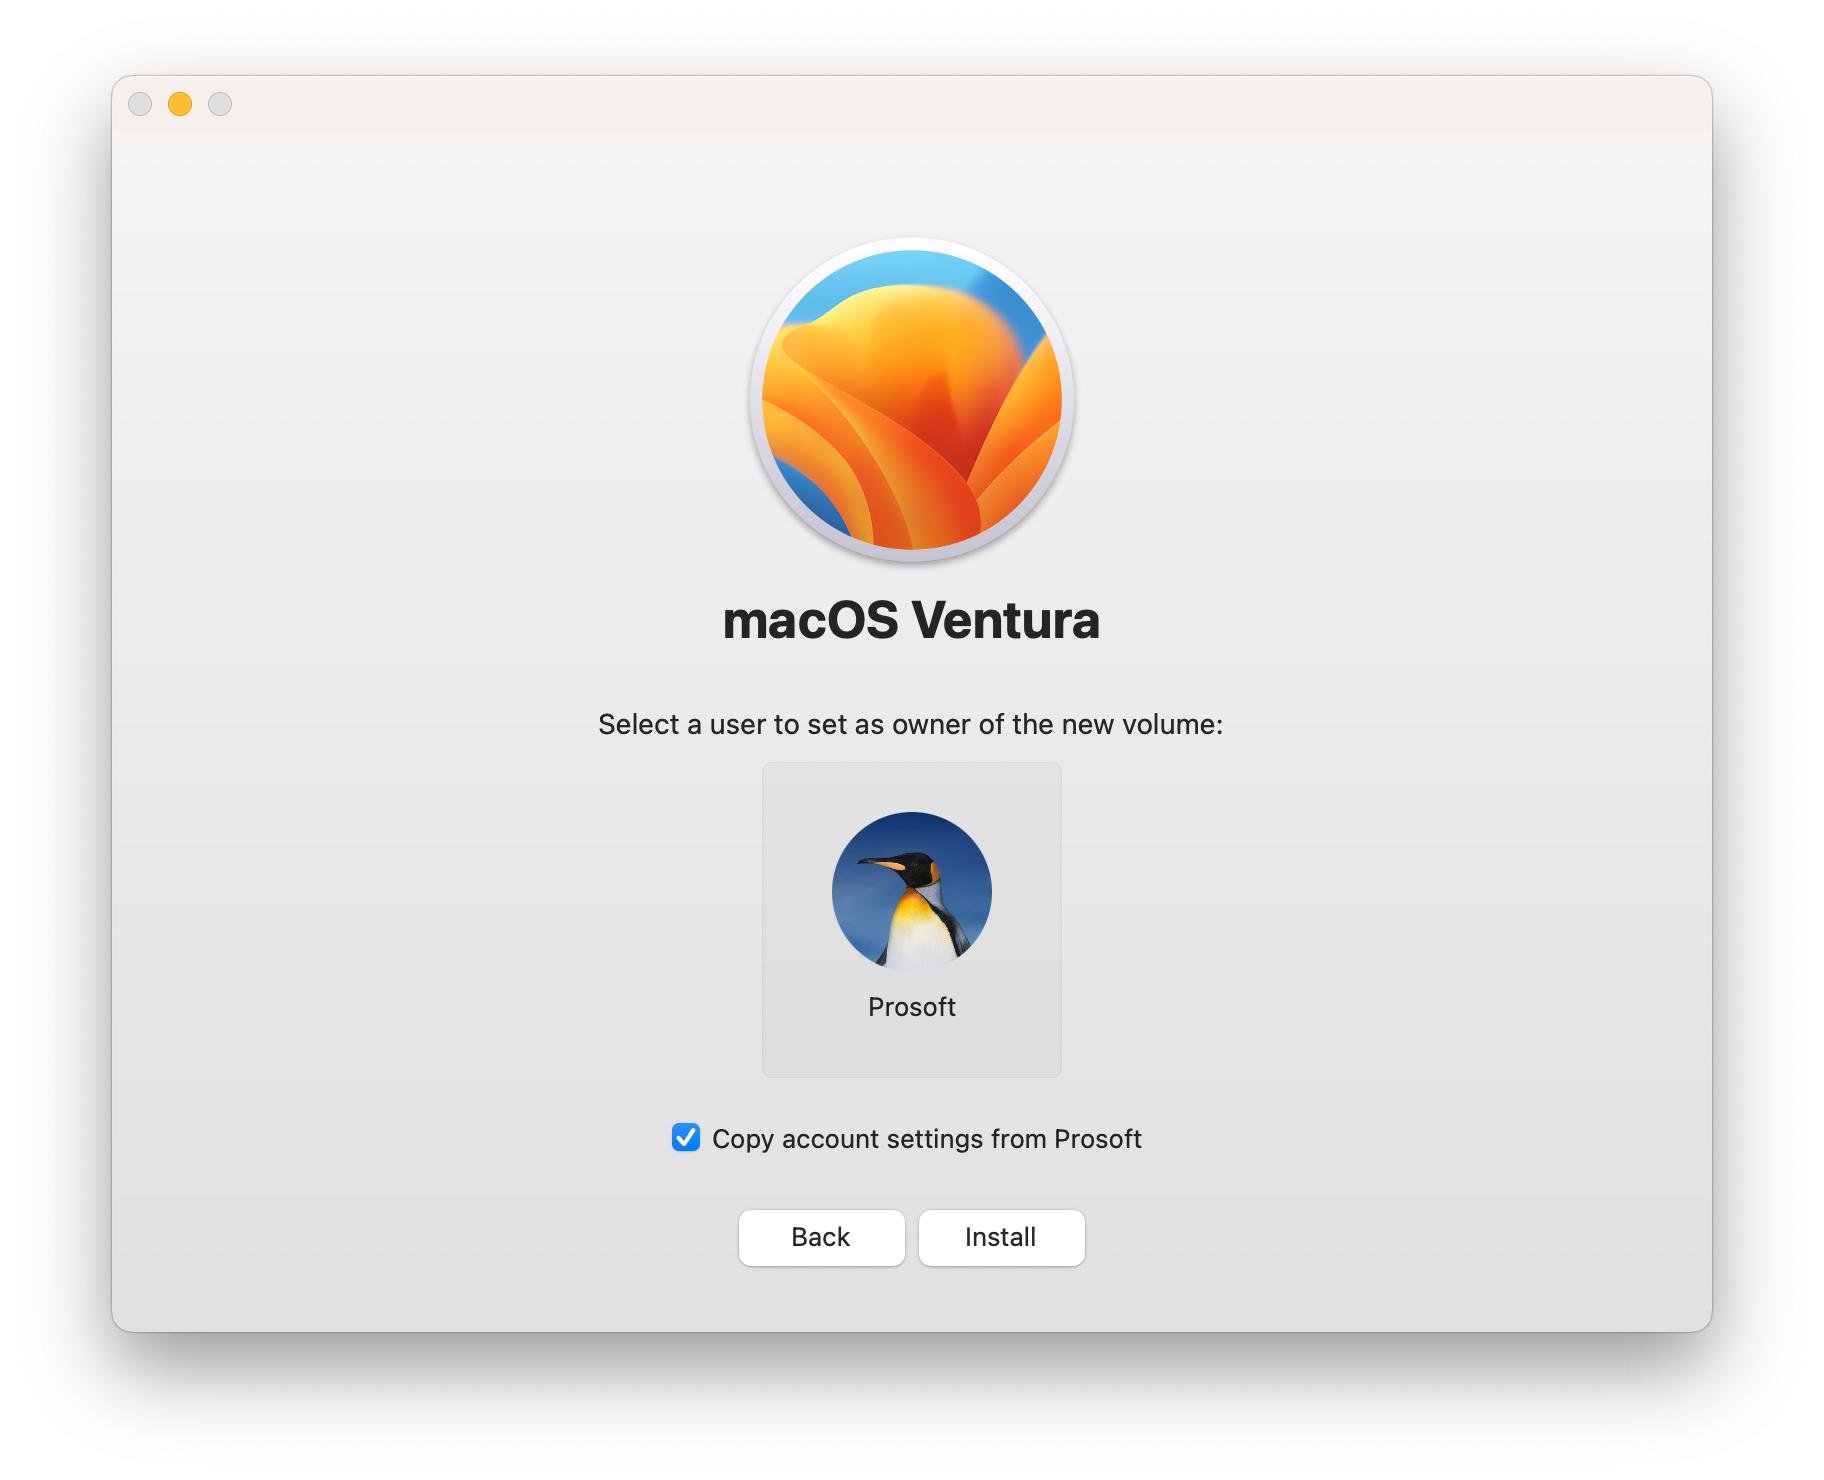
Select your drive and continue to the next prompt. You will be asked to select a user to be the owner of the new Volume being created. You will need to know the admin password for the user selected to boot into the drive for the first time. Once you select a user to take ownership of this external boot drive you can go ahead and select Install.
The installation process will vary on many factors like connection speed and how the external drive is connected. It is preferable that you have the external drive connected directly via USB to the computer and not via any USB hub or a daisy chain setup. That said the installation process will take around 20min to a little over an hour. Once the install process is complete the system will ask to be restarted as it has to verify that the external drive will be bootable.
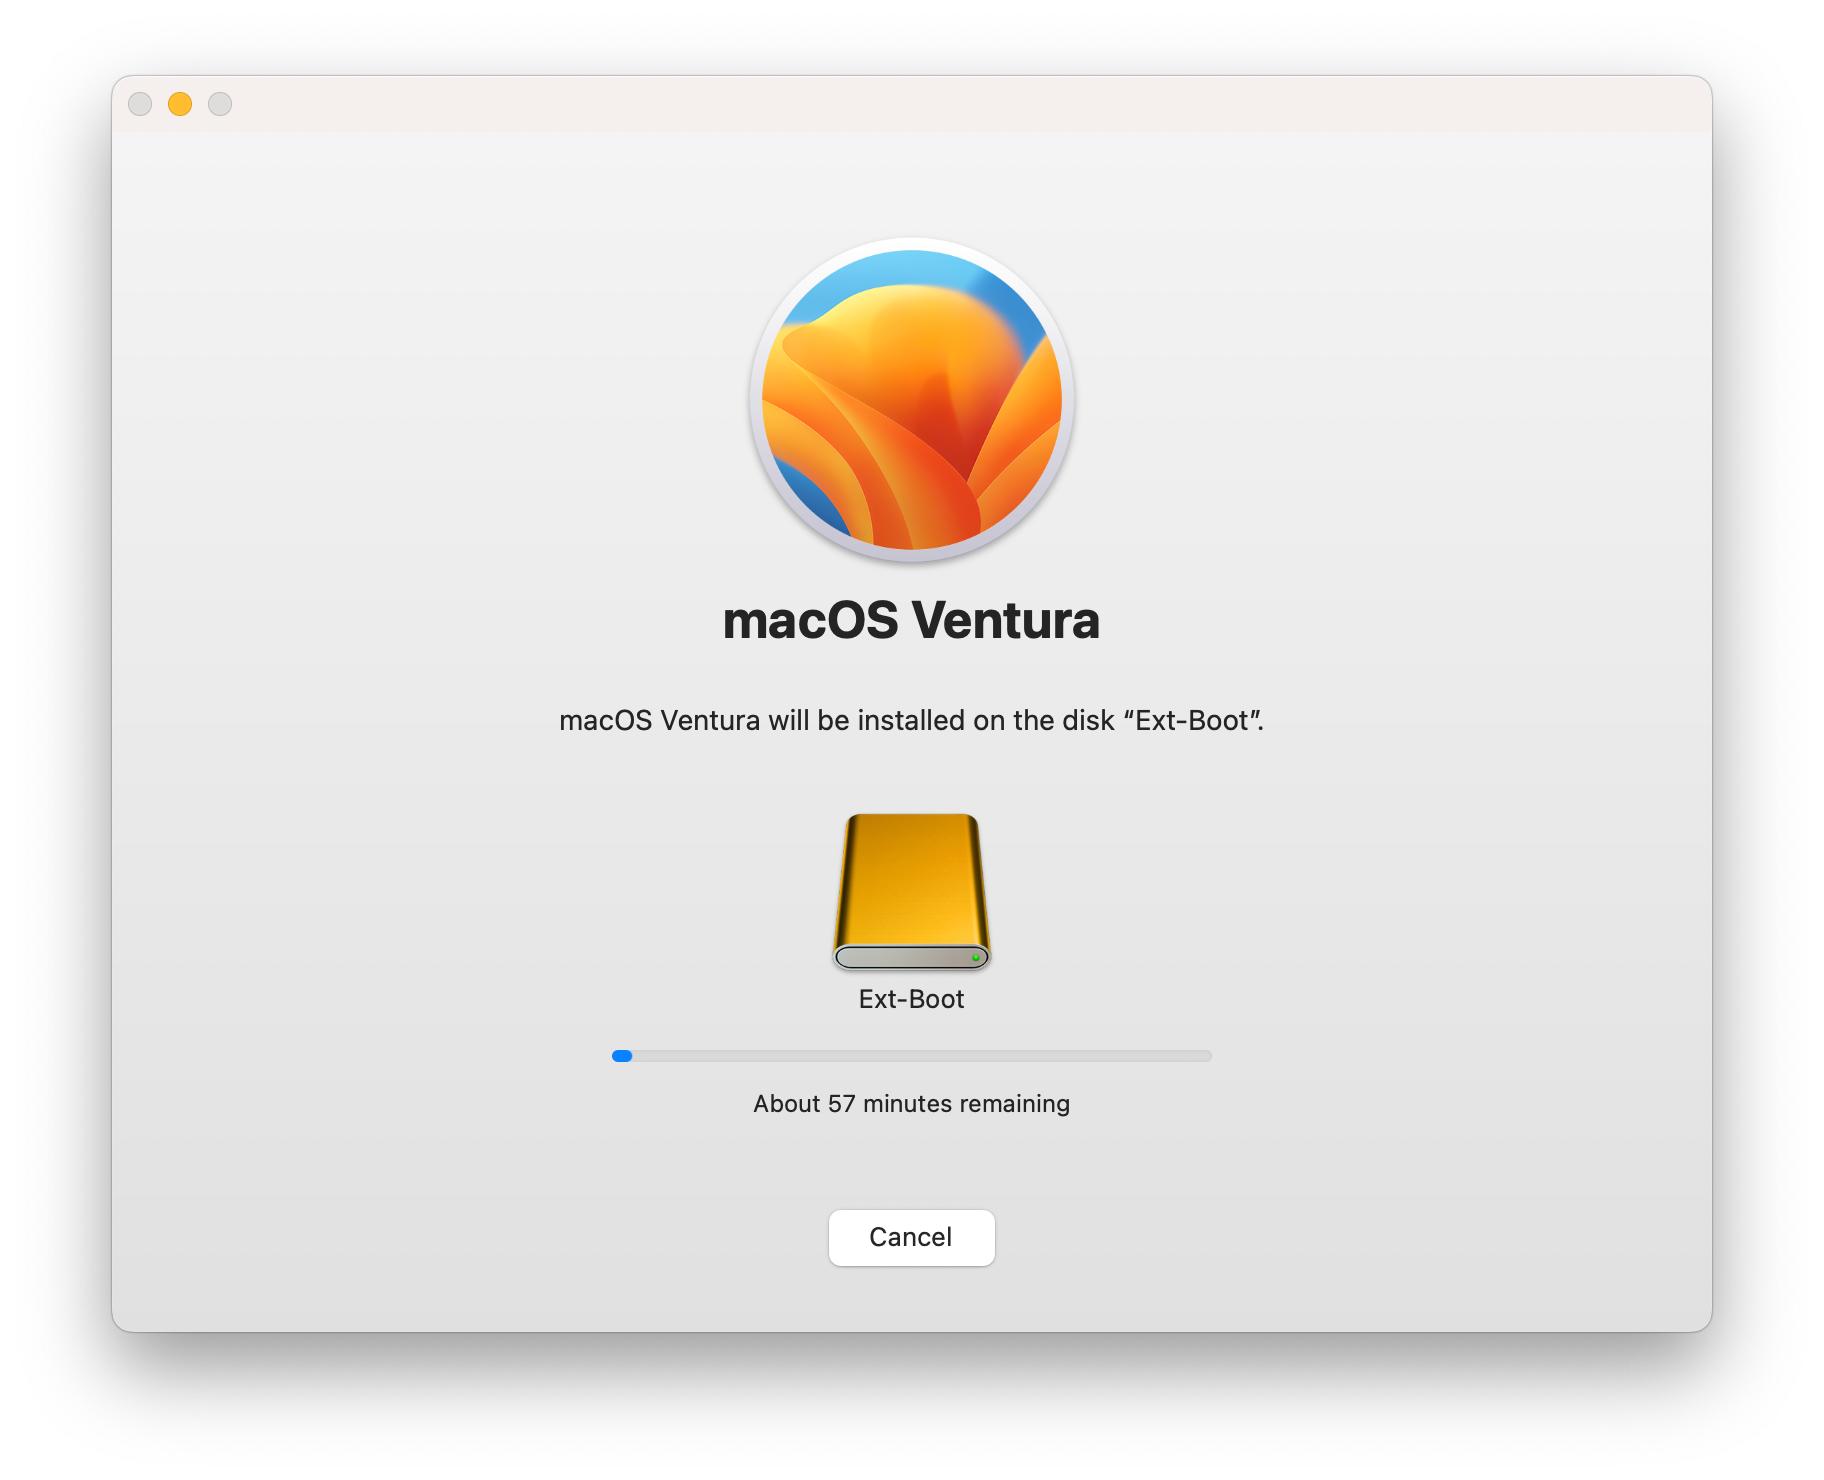
The system may restart a few times so just sit back and let the verification process complete. You may be eager to force the system to shut down because it doesn't seem to be doing anything. But please, let the system work and leave the system alone for up to 35 minutes or more.
Once the system has verified the external hard drive it will boot into it. You need to run through the macOS setup process as you would for a new macOS computer. You will be prompted to enter the password of the profile used when the installation process began. Once you have completed the system setup process you will be displayed with your external hard drives desktop.
You will notice that the system may run a little slow upon first boot. This is completely normal and is due to services running additional checks as this is the first time booting into this drive with macOS. You will find some services like mds_stores, and mds taking up 100%+ CPU usage for the first 5 - 15 minutes of starting up the system. These services are indexing the operating system so that you can use Spotlight searches efficiently moving forward. Once these services are done indexing the system you will have full access to an external boot drive. You can boot back into your normal system by selecting your internal hard drive within your Startup Disk menu in System Preferences.
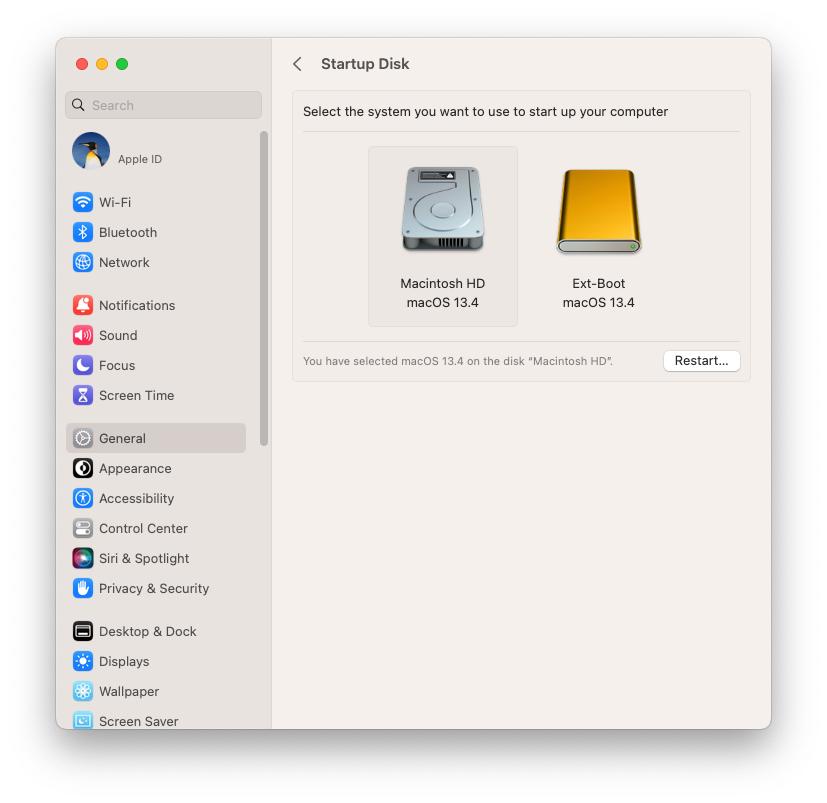
You can follow this same process to select it as your startup drive if you ever want to boot into it again or select it as your startup drive within your boot options menu.
You can get into your boot options menu by either holding down the power button while booting a Silicon-based (M1/M2) Macs or by holding the Option key while booting an Intel-based Macs.
How do I make my external hard drive bootable?
You can follow the steps described above to create a fully bootable external hard drive on Intel or silicon-based Macs. The installation process is fairly simple.
Can an external hard drive be used as a boot drive Mac?
Yes, an external hard drive can be used as a boot drive on Macs. You can create it using a macOS installer or by creating a clone of your start-up drive using Apple Software Restore (ASR). You can follow this guide to install macOS or view our guide on creating a bootable clone.
How to make a bootable macOS Monterey external hard drive?
Creating an external bootable macOS hard drive on Monterey can be done by installing the macOS Monterey installer and selecting your desired external hard drive as the install location.
Why is my external hard drive not bootable Mac?
The external hard drive may not be bootable because it does not have a valid or supported OS. Make sure your external hard drive has a valid version of macOS or follow these steps shown above to create a bootable external hard drive.
How to make external hard drive bootable without formatting?
Formatting is a necessary step to create a bootable external hard drive for macOS and Windows. There may be ways around this, however, it's better to ensure you have a fresh install of the operating system as this will reduce any chance of issues.
How do I make my Seagate external hard drive bootable?
If you are trying to have your Seagate external hard drive bootable with macOS you can follow these steps to create it. Download the version of macOS you want to run on the drive and select your Seagate external hard drive as the installation location when prompted.
How do I know if my external hard drive is bootable?
In macOS, you can check if your external hard drive is bootable by looking in your Startup Drive menu found in system preferences. If the external hard drive is shown as a boot option this is a sign that the hard drive is bootable. To verify this you will want to select a boot drive and see if the drive is selectable. There are some situations when macOS can not verify the boot drive and it will not be selectable even though it is shown.
Why is my USB HDD not bootable?
There are many reasons why the external hard drive may not be bootable. If there is an older version of macOS on the drive it may not be supported as a boot option anymore. You should still be able to see it as an external hard drive and extract the needed data. You can then follow the steps above to create a new bootable external hard drive with macOS. If the drive is no longer accessible by the computer you may want to try data recovery software like Data Rescue to attempt to recover the data that is on the drive.
Can you run an OS from an external hard drive?
Yes, you can run an OS from an external hard drive. You can follow the steps above to create a bootable external hard drive that will run on macOS.
Do I need to format USB for bootable USB?
In some situations like those described above an external drive may not be formatted correctly to support the installation of macOS. Reformatting (Erase) it in Disk Utility to a supported format (APFS) will allow you to select it as an install location for macOS.
What format does a USB drive need to be bootable?
With the latest version of macOS like Sonoma, Ventura, Monterey, and Big Sur (anything above macOS 10.13). You will need to format the drive to APFS so that it can be used as an install location for macOS.