Live Defrag
Using Drive Genius 3 to defrag your internal HD can speed up your boot times and improve application and file access overall. In this blog I will briefly explain the basics of file fragmentation and how to defrag your Mac HD volume with Drive Genius 3.
Adding and deleting files to and from your hard drive will cause the drive to become fragmented. When the OS writes files to the drive, it will look for empty space on the hard drive to write data to. However, this will cause the drive to slow down as it will need to scan multiple parts of the hard drive to locate and read the file. Drive Genius 3 puts all these broken up pieces together into one continuous block with all of the empty space at the end.
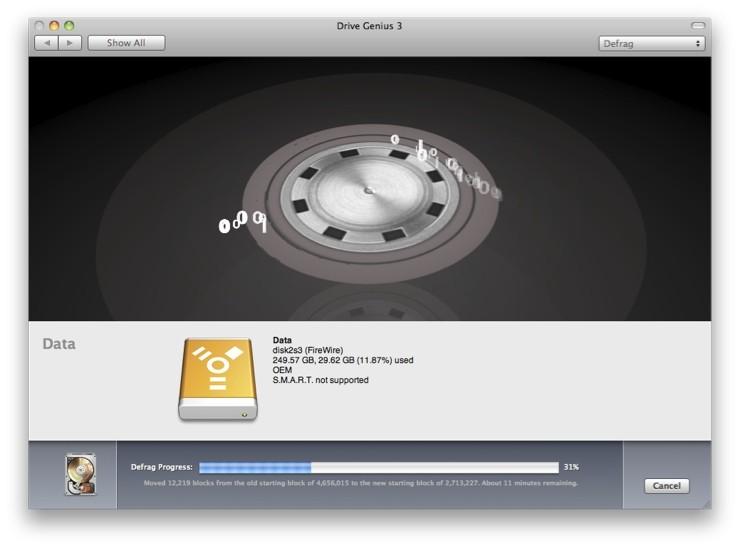
New to Drive Genius 3 is Live Defrag. There is no longer a need to restart your computer from alternate startup drives or the Drive Genius 3 startup DVD. Simply select your drive and click Start. Your system will restart to a minimal system, the defrag routine will run and check your drive for errors, then defragment your drive. Once complete, your system will restart normally.
To defragment your drive follow the steps below.
Before starting the defrag be sure to backup your drive and close all open files and applications before proceeding.
1. Launch Drive Genius 3
2. Click the Defrag Icon.
3. Select the volume you wish to Defrag.

Volume Fragmentation will display a graphical representation for a quick overview for the files laid across the volume to indicate how much fragmentation is across the hard drive. Four different colors are displayed to indicate the usage of space:
The red portion represents fragmented data
The white portion represents free space
The green portion represents used space that is not fragmented.
The yellow portion is reserved space required by the Mac OSX and can’t be defragmented.
4. Click the Start button to proceed.
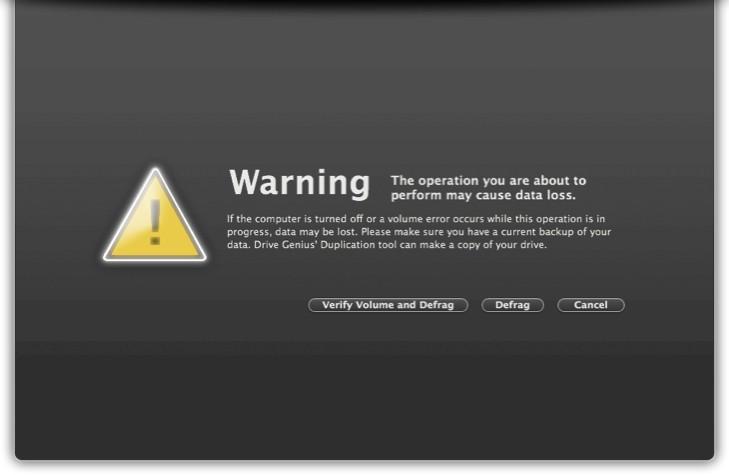
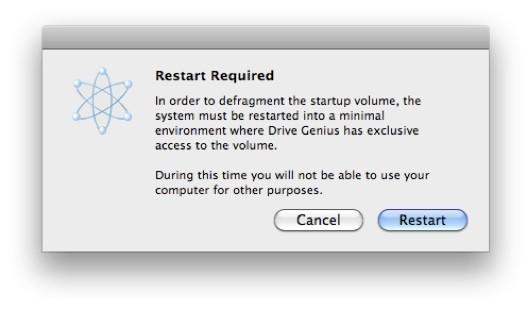
5. You will be prompted with a “Warning that this operation may cause data loss” This is a standard message to ensure you do have a good back before proceeding. Additionally we recommend selecting the verify volume and defrag. After selecting defrag you will be prompted with a “Restart Required” message
The defragmentation process can take several hours so you will want to plan accordingly. Keep in mind when defragging a TB HD or larger it can take an excess of 8 hours or more depending on the size of the drive.