How to Add a File to Scan on Mac
Data Rescue has the ability to scan disk images. You can either use the cloning process in Data Rescue, or a 3rd party software to make a disk image.
Step 1
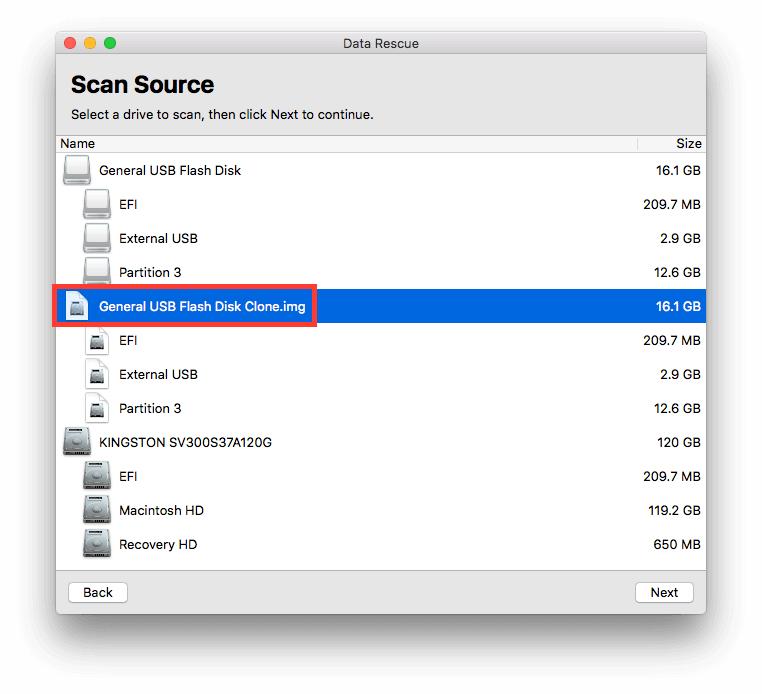
Go to the File → Add File to Scan drop-down menu option. In the example below, the General USB Flash Disk was cloned to a disk image.

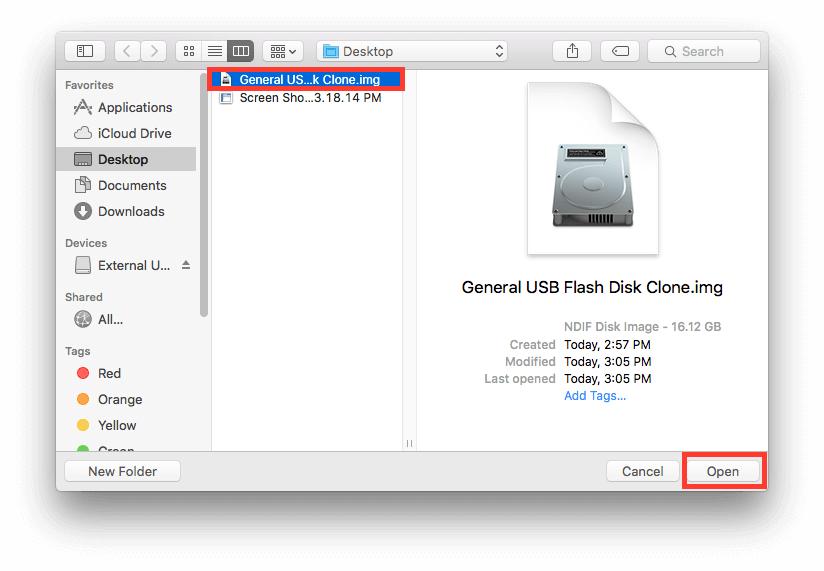
Step 2
After the new popup window appears, navigate to wherever you have saved your disk image file, select it, and press ‘Open’ in the lower right of the window.
Step 3
The disk image will now appear under the list of source drives available for scanning. You can select the disk image and press ‘Next’ to move to the scan type selection screen and begin your scan.