Recovering Files
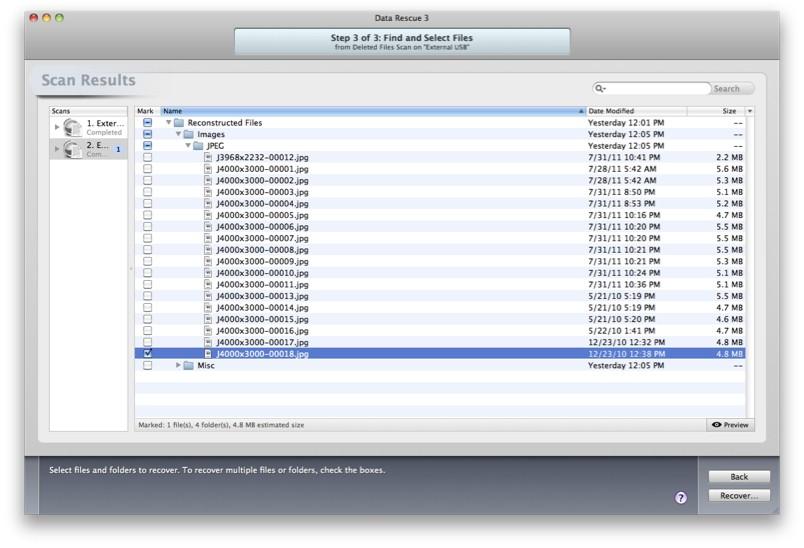
After your scan has finished you are ready to view your results and select files for recovery. Data Rescue will organize files into two different folders the Found Files and Reconstructed Files.
Found Files will be listed in the results window when using a Quick Scan or Deep Scan. Found Files displays files from the Mac OSX file system in the original directory structures and file names if its intact.
Reconstructed Files will be listed in the results window when using a Deep Scan or Deleted Files Scan. The Reconstructed Files results will organize any found files by category and file type. These results will NOT have their original directory structure and will usually not have their original file names since they are found by file patterns.
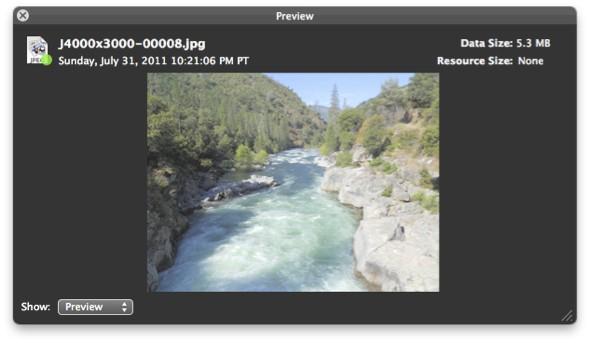
The Preview feature allows you to view major file types before recovering the files. This will help determine whether the files can be recovered properly before being transferred onto another hard drive.
We recommend previewing multiple files before recovering an entire folder or an entire drive to ensure the files are valid and openable.
Previewing files within Data Rescue 3
1. Click on a file’s name within the list to highlight it.
2. Click on the Preview button or press the space bar on the keyboard to view a thumbnail of the image or an overview of the document. Or double-click on the file you want to preview. (double-clicking is disabled when using the DVD)
If you are using Data Rescue 3 ver 3.2 or higher you can view the dated created info on images taken by a digital camera. This can be very helpful when recreating an iPhoto library from your results.
If your files are not previewing properly you can try adjusting the ABL settings. These settings apply to the Deep and Quick scans only.
Recovering your files
While previewing the files, you may begin marking any files to recover. You may choose to recover each file individually or in groups by marking multiple files and pressing the Recover button, or dragging and dropping files into a Finder window to recover them to the destination hard drive.
Specific files can be marked for recovery by using the checkboxes within the Scan Results list. This allows you to choose multiple files or folders throughout the scan results to be recovered as one process.
1. Click on the checkboxes to mark any files you are interested in recovering.
2. Click on the Recover button.
3. Select the destination for your files to be transferred to and click on Open.