Activation / Browse Previous Scans
Activating Data Rescue 3 from demo mode
Step 1
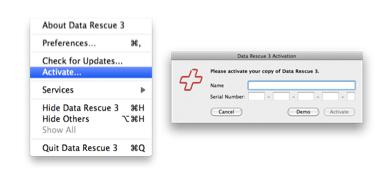
You may activate Data Rescue 3 after a scan is complete by going to the “Data Rescue 3” menu at the top of the screen and selecting “Activate”.
Step 2
Simply enter your name and serial number into the program and click the “Activate” button to unlock the full functionality of the software.
From here, you may continue with your recovery process without having to rescan the drive.
Browse a completed or suspended scan after activation
Make sure that all drives are all connected the way they were setup originally to view previous scans results.
Step 1
You can select “Browse Completed Scans” from the welcome screen at start up.
Or if you are in a different step simply click on “View” from the menubar and select “Scan Results”.
If more than one scan was completed, select the completed or suspended scan from the list on the left column to load the results of a previous scan.
Quick scan results are shown in the found files folder.
Deep scan results will be displayed in both folders.
Deleted files scan results will be displayed in the Reconstructed files folder only.