Recovering from an Accidentally Reformatted Hard Drive
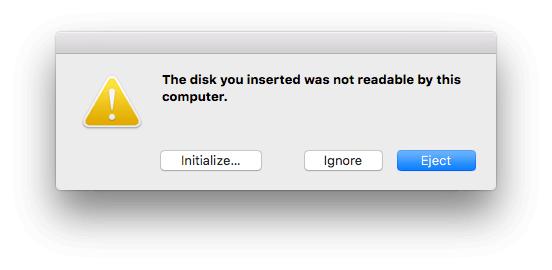
A common data loss scenario for a Mac user happens when a drive is accidentally reformatted. This is a frequent mistake because when macOS is not recognizing a drive properly, a pop-up will notify you that the drive is not readable by the computer and needs to be initialized before use.
Another way this happens is when a drive is reformatted when upgrading the computer’s operating system to a newer version. Luckily, if you are Mac user and have lost data due to accidentally reformatting a hard drive, your files may be recoverable using the Data Rescue software recovery tool.
What to Know Before Recovery
This first thing you’ll want to know is how recovery is possible in these situations. Hard drives use what is referred to as a “file system” to logically control and organize the way data is read and written to the drive. The file system acts as the directory for file and folder names and tells the computer where the contents or data of a file is stored on the hard drive. When a hard drive is formatted, the file system is rewritten; which means the file names are no longer linked to the actual data contents on your hard drive, and all data areas of your hard drive are considered to be available free space.
Fortunately, your files are not actually lost in the reformat process. Until the files are overwritten with new data, a software tool such as Data Rescue can still scan the drive and identify files based on known file patterns, and then reconstruct the lost files.
In any data recovery scenario, the first step should be to prevent further data loss by minimizing or completely eliminating the use of the computer or hard drive until you can run Data Rescue. As discussed above, your files’ locations are considered available free space and can be overwritten with new data. This means if you have accidentally formatted an external drive you will ideally want to disconnect the device until recovery, or at the very least not save any new files to the device. For an internal drive you will want to power down or minimize use of the computer, as tasks as simple as web browsing can save temporary files to your computer that could overwrite your files.
Since there is a possibility that some of your files could be partially damaged or fully overwritten, we recommend trying the demo version of Data Rescue first. The demo has the same scan capabilities as the full version and will allow you to preview recovered files to ensure they are valid and recoverable before purchase.
Downloading and Installing Data Rescue
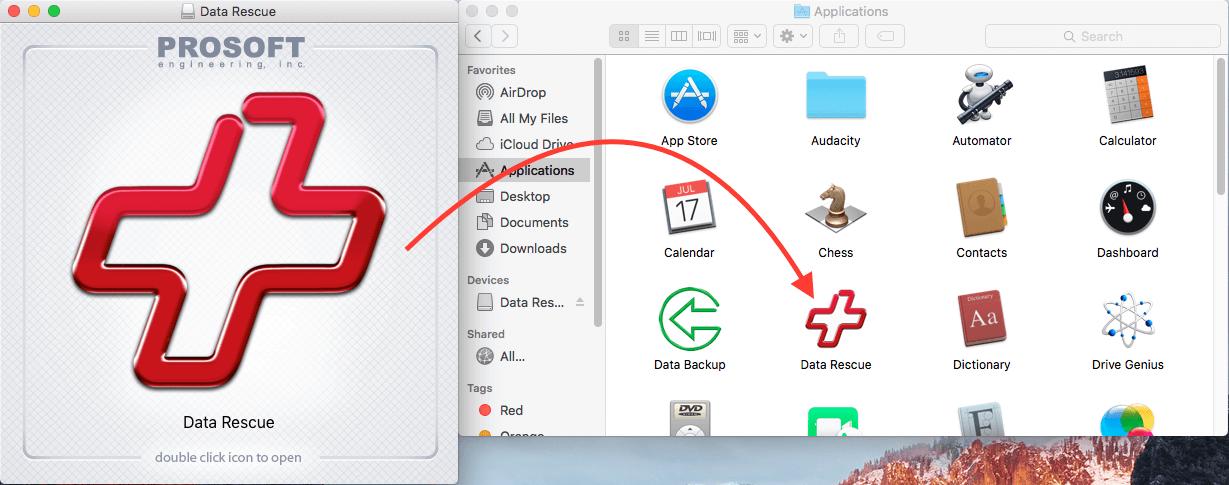
The first step in recovering from your reformatted drive is to download and install the software. If you have already installed Data Rescue you can skip to the next section. The software can be downloaded directly from our website on our Downloads page. After the download has finished, open the Data Rescue DMG file. A window will open with the Data Rescue logo. To install the software, you will want to drag the icon into your Applications folder as pictured below.
The software is now installed and can be launched from your Applications folder. You will be prompted to enter your name and asked for either your demo or purchased serial number. After entering that information, you will be taken to the Welcome screen and are ready to select your reformatted drive for scanning.
Scanning a Formatted Drive with Data Rescue Mac
Upon launching the software you will be taken to the Welcome screen. From this screen select the first option, ‘Start Recovering Files’. You will be taken to a screen similar to the one below.
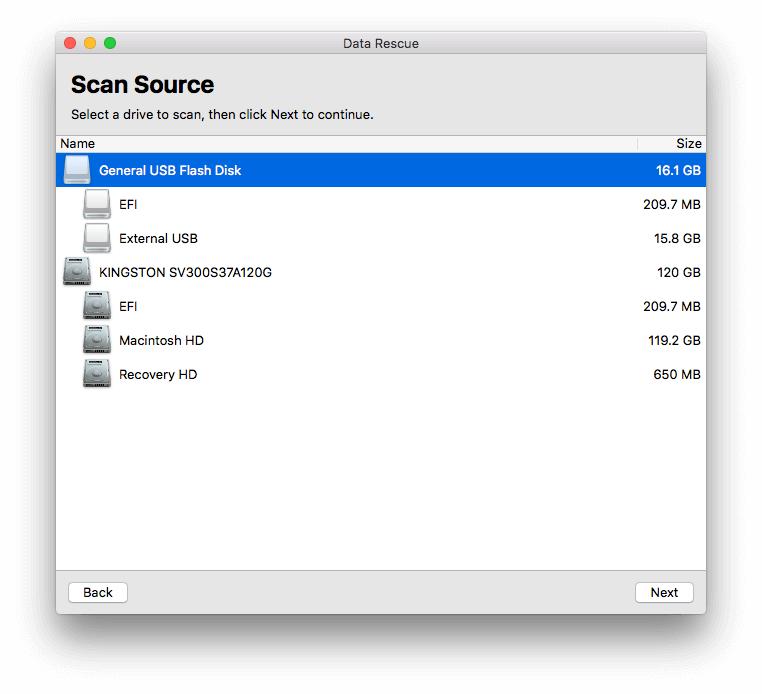
In the example above, we have lost data including an important document containing a blog post from an external USB device named External USB. When scanning a device that was formatted, you will want to select the device name rather than volume name. In the above example the device name is General USB Flash Disk, so that is the item we have selected to scan. Generally the device name will not be indented, while any volumes on the device will be slightly indented below the device name.
Note: If we wanted to scan the internal drive we would select the Kingston device name as it contains our volume name Macintosh HD, however the device reformatted in this example was the external USB. If you are recovering from an internal startup drive that was formatted you can follow the steps in this blog post: Data Recovery From Internal Mac Hard Drive.
After selecting your reformatted device press ‘Next’ in the lower right, and you will be taken to the Scan Selection screen. For a formatted device we recommend running the Deep Scan, as the Quick Scan only looks at existing directory structure and will therefore not find files lost due to accidental reformatting. After selecting the Deep Scan press ‘Start’ in the lower right to begin scanning your reformatted device.
Previewing Scan Results & Marking Files for Recovery
Once your scan has completed you will be presented with the Scan Results screen. For a reformatted device you will want to look in the Reconstructed Files folder by file type to find your files. You will not find files with their original file name (due to the reformat process) which makes it so that previous files are no longer associated with their file or folder names (as described in the What To Know Before Recovery section).
Files will be given generic names and grouped by file type/extension. You will need to preview or open the found files for the file type you are looking for to identify the files and verify their contents are intact.
In the example below, we have drilled down into the folders of recovered files to find a document recovered by the software.
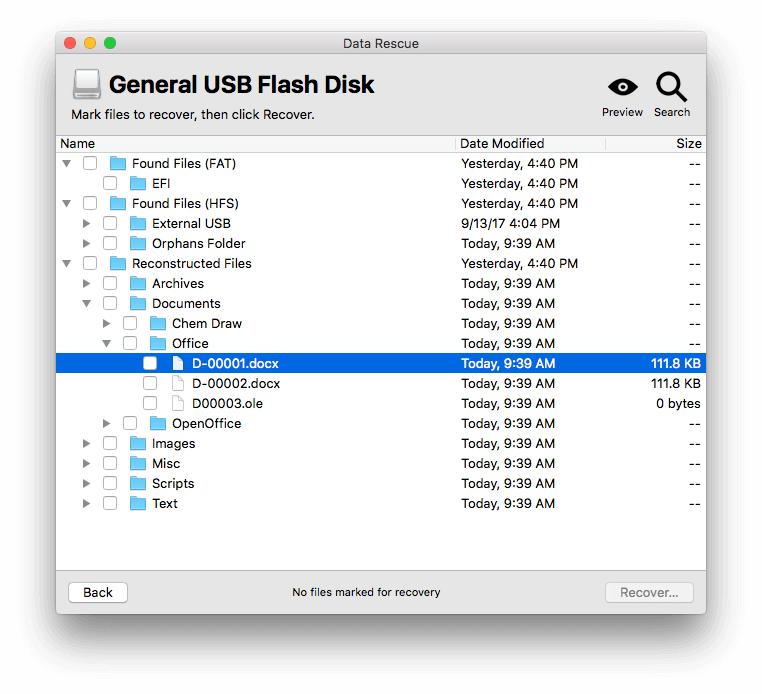
As you can see this file has been given a generic file name. To see if this is our missing document, we can highlight it as shown above and press ‘Preview’ in the upper right.
It looks like this is the missing document we were searching for, and we have verified its contents with the preview feature.
To mark files for recovery, click the checkbox to the left of the file or folder you’d like to recover. You can also press the Space key to highlight the selected file or folder.
Recovering Formatted Files Using Data Rescue Mac
After marking files for recovery, press ‘Recover’ in the bottom right of the window. You will be prompted to select a location to recover the selected files to. This location can be any location other than the reformatted device you have scanned. Recovering back onto the reformatted device could potentially overwrite files that still need to be recovered, so Data Rescue will not allow you to recover to the source drive.
After selecting a recovery destination press ‘Open’ in the lower right to begin the recovery process.
Your files have now been successfully recovered from your reformatted hard drive! To access the files you can simply navigate to the destination location you selected during recovery. From there, you can browse, rename, and reorganize files as needed, as they will still have the same names and folder structure as shown in the Scan Results screen.
It is recommended that you make a backup of your recovered data as soon as possible to protect against future data loss. After you have recovered and backed up the files, it is safe to use the original drive again, allowing the reformatted files to be overwritten with new data.
About the Author

Ryan O.
My name is Ryan and I provide technical support and perform software testing for Prosoft Engineering, to ensure we provide customers with the best software experience possible. I also provide customer service for clients at The Data Rescue Center that have physically damaged devices. I enjoy helping customers maximize their chance of recovering and protecting their files, regardless of their potential data loss situation.