Recovering Data After Accidentally Initializing a Drive
What Does It Mean to Initialize a Drive?
Initializing a drive basically means to format the drive. To break this down a bit further, all drives that are used on a computer are formatted with a specific file format, which is essentially just an organizational strategy on how your files will be saved to the disk.
When you initialize a drive, you are refreshing those organizational rules to bring the drive back into a working condition. However, this will erase all of the data that is currently on the drive, and what you are left with is a completely empty drive.
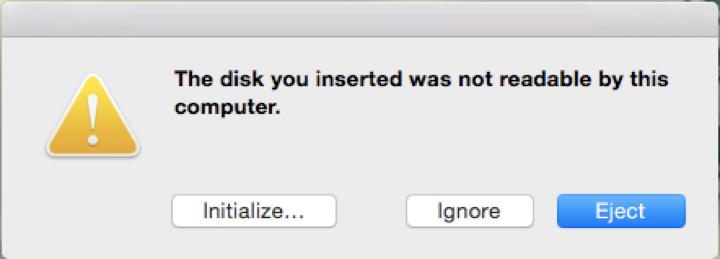
Have you ever received the above message on your Mac, and then been confused on how to move forward, what all of these options mean, and why you got this message?
Throughout this post we are going to go over what all of the options within this dialog box mean. We will also break down how you will want to move forward whether this is a brand new drive, or a drive you are trying to recover data from.
If you have any questions on how to move forward with recovering your data, please feel free to reach out to our US-based technical support team to have them guide you through the recovery process.
Why Am I Seeing This Message?
There are many reasons that can lead to this message being displayed, but essentially this is because there is either no partition map on the drive, or the partition map is not being recognized.
A partition map is a log of where all of your files sit on the drive; it’s the address book to where all your files are located. Even if the partition map is not recognized, your data could still be 100% intact and recoverable with recovery software.
You will see this message the first time you insert a new drive into your system, as most drives are not going to come from the store formatted for a Mac. Using the ‘Initialize’ button is ideal for a new drive, as it will make the drive compatible on the Mac platform.
If you are seeing this message on a drive you have used in the past and you know that it contains some data, the drive is most likely suffering from corruption. Normally a drive will receive the corruption due to the drive being disconnected from the computer without being properly ejected from the system and is not a sign of the drive failing.
In most cases the drive can be repaired with a simple initialize, however initializing the drive will erase all of the data that is currently sitting on the drive. You will want to use a data recovery utility to pull all of the data that is currently sitting on the drive before initializing.
Installing Data Rescue to Run Your Recovery
To begin your recovery you can download the Demo of Data Rescue on the Downloads page.
In order to receive a serial number for the demo software, you will need to enter your email and select the Download button. An email will be sent with a serial number, as well as a download link. When you click the download, a new webpage will be opened and you will be prompted to select ‘Save File’.
Once the download is completed you should receive the following popup box:
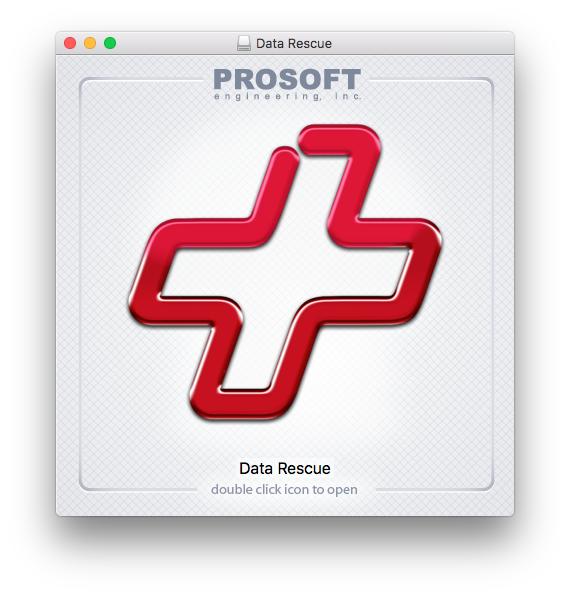
Double-click the “+” icon to open the software.
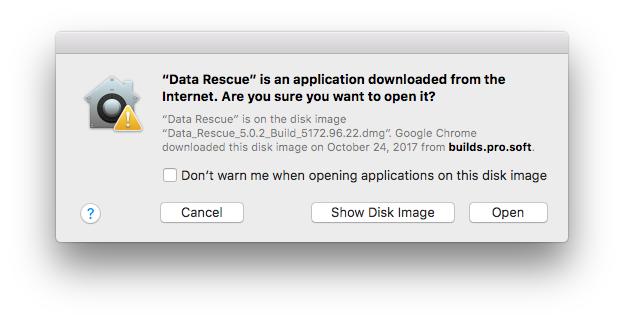
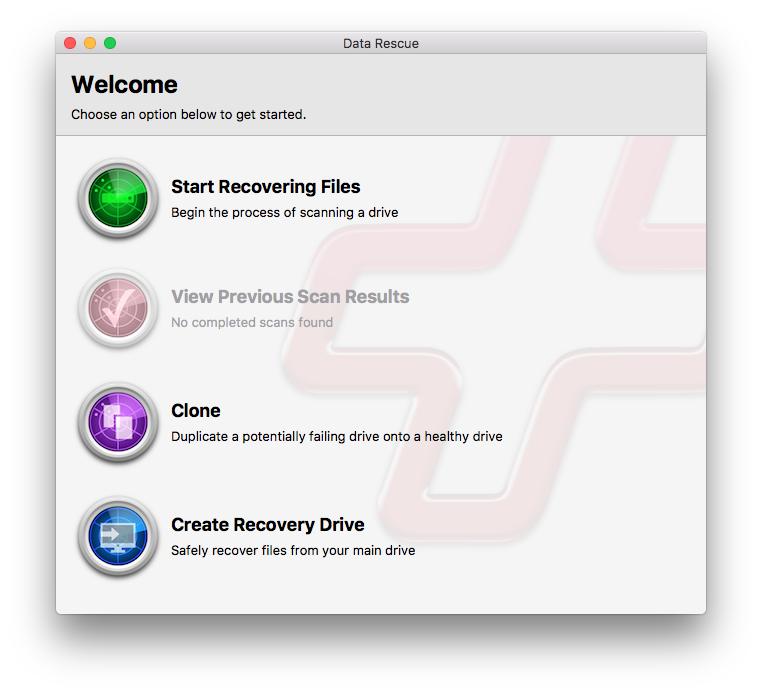
Select ‘Open’ on the above dialog box. This will then prompt you for your username and password for the computer. Now you should be presented with the Welcome screen for the software seen below.
What to Do If Data Rescue Cannot Be Installed?
When following the instructions to download Data Rescue did you receive this message?
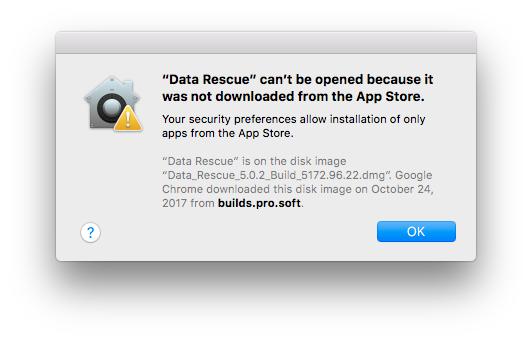
This message indicates that your system is set up to only make downloads from the App Store. Unfortunately, due to the nature of data rescue software, we are unable to offer the full software within the App Store.
In order to get around this issue you will need to open your System Preferences on your Mac and select ‘Security & Privacy’. With this window open you will need to click the padlock on the bottom left of the screen and enter your computer admin password.
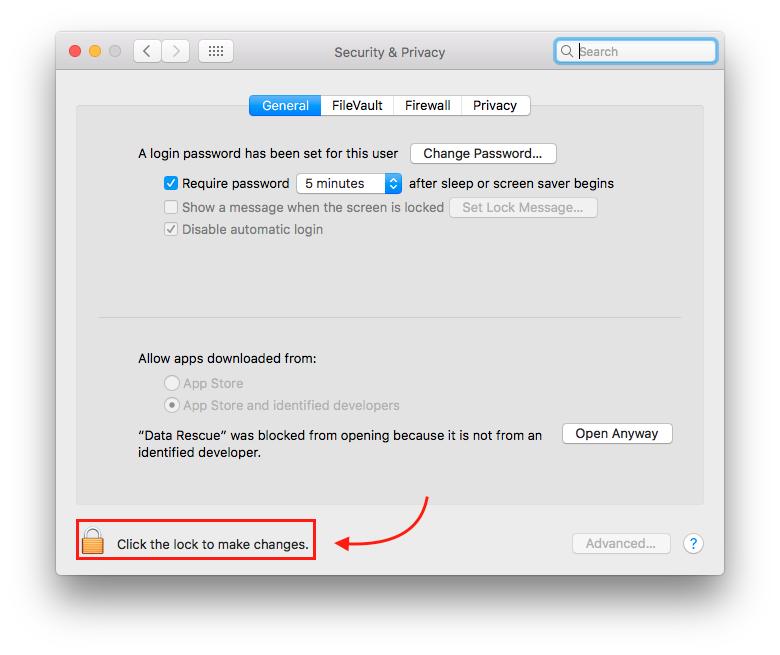
This will unlock the Security & Privacy window.
Now in the section labelled “Allow apps downloaded from:” you will want to select ‘App Store and identified developers’.
At this point you can close out of the Security & Privacy window and go back to following the download instructions.
Recovering Data from an Unreadable Disk
If you received this message but would still like to extract the data from the drive, we highly recommend selecting ‘Ignore’ on the dialog box. Clicking Ignore will leave the drive connected to the system to be accessed by Data Rescue. In a majority of cases, drives that receive this issue, click Ignore and start a recovery, have no issues recovering the lost data.
If you have not already installed Data Rescue please follow the above steps on how to install the software, this section is going to assume the demo of the software is already installed.
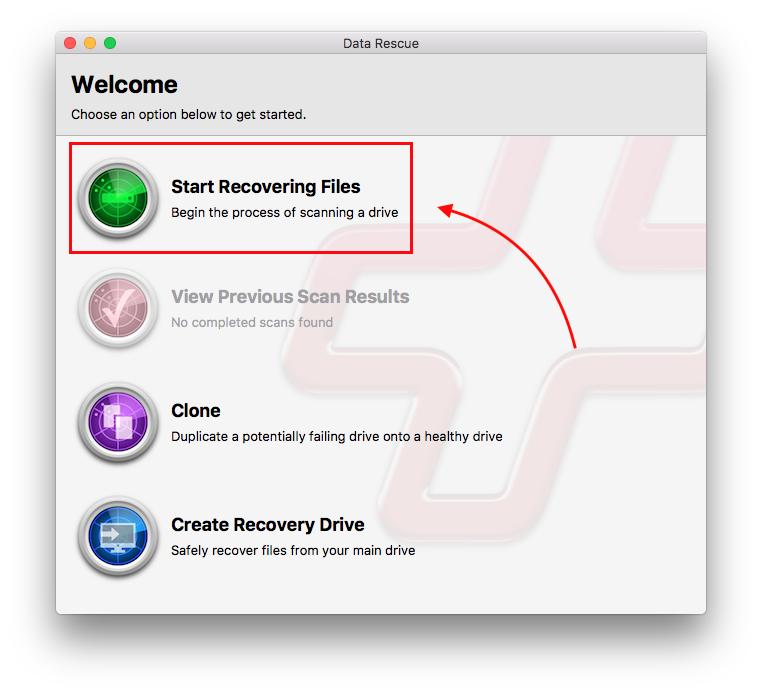
On the Welcome page of the Data Rescue software you will want to select the top option ‘Start Recovering Files’.
The following page is the source page of the software, this is where you will select the drive you wish to recover data from.
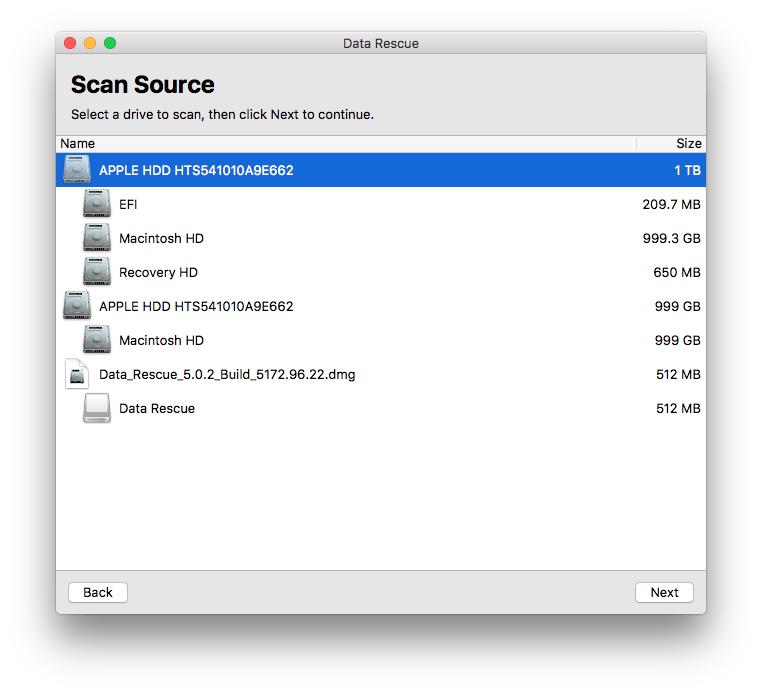
In my example I have two physical drives connected to my system, as well as the disk image for Data Rescue, since it was just installed. Your screen will differ from the above screenshot depending on how many drives you have connected to your system.
The first line that is highlighted is the physical drive, and my main startup drive for my computer. If you accidentally initialized your startup drive, you will want to select the main physical drive to scan. You will want to highlight the drive you wish to recover data from, then select ‘Next’ on the bottom right hand corner.
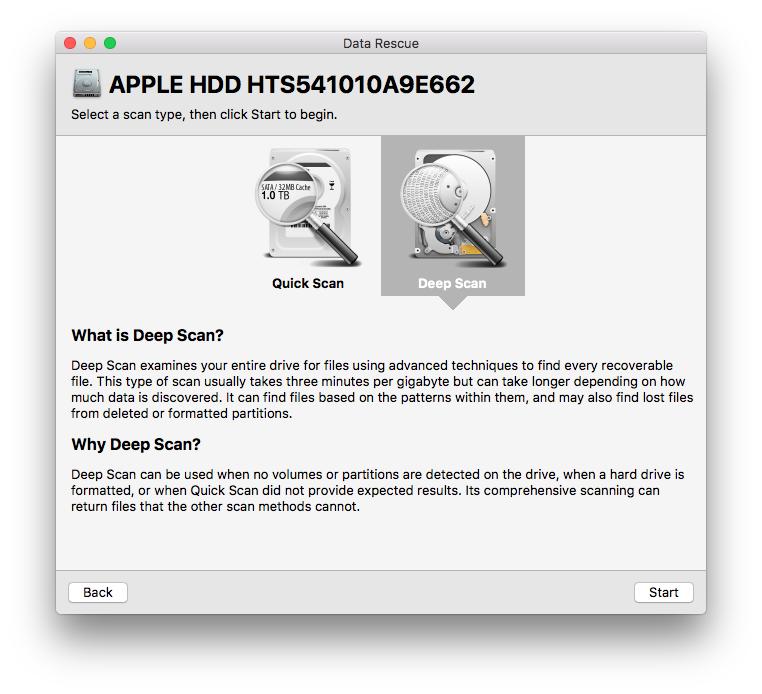
The following page is where you will select the type of scan you wish to run. Both of these scans are available within the demo and have the full functionality of the purchased software. If you are unable to find the files you are looking for with the demo, you will have the same results on the purchased version.
You can click on the different scans on this page to give a rundown of what each scan is used for.
Once you have selected a scan, go ahead and click ‘Start’ on the bottom right hand side to begin the recovery process.
For a 1TB drive running a deep scan you should expect a scan time of 6-8 hours, or longer if the drive is suffering from any physical issues.
What Will Ignoring This Message Do?
Ignoring the message will simply leave the drive connected to your system, however due to the corruption on the drive it will not be accessible.
Clicking Ignore will leave the data on the drive intact to perform a data recovery.
What Will Ejecting the Drive Do?
If you select to eject the drive it will disconnect the drive from your system. If you do not have the available time to run the recovery, it would be our recommendation to eject the drive and place it aside until you are ready to perform the recovery.
About the Author

Matt T.
My name is Matt and I work alongside the technical support team at Prosoft Engineering to provide friendly customer support for anyone using our software. I am also a customer service representative for their sister company, The Data Rescue Center. I enjoy helping others and strive to inform users on how to keep their files safe and maintain performance for their computer.