How to Find Bad Blocks on a Mac Hard Drive
What Is a Block?
One of the most common symptoms of a failing hard drive are bad blocks, also known as bad sectors. A block or a sector is a unit of measurement used to break up your hard drive. A standard block is going to be 512 to 4,000 bytes depending on your drive, and a 1TB hard drive will hold around 21,474,83,648 blocks.
To give an easier representation of what a block is, if you imagine your hard drive is a filing cabinet, the individual drawers are going to be your partitions, and the individual pieces of paper in the drawer are the block or sectors that your data is physically stored on. Continuing with this analogy, if one of the pieces of paper was damaged you would no longer be able to read the data on the single piece of paper. Potentially, if you had a document that was written across multiple pages or blocks, you would only lose the segment of data that was on the single damaged page or block.
Since blocks are the location in which your data is physically written to the disk, when you receive a warning about a bad block it is an indication that you have some physical damage on your drive. Once you receive your first bad block you will start to see more appear in a shorter time frame, as every time your drive spins and the read/write head travels over the damaged block it will extend the damage and cause more blocks to fail or go bad.
Most situations when our support staff is dealing with bad blocks occur when a customer is using Data Rescue to recover data from a failing drive. Despite there being billions of blocks on the drive, we recommend to stop the recovery if you receive more than 5 bad blocks: once you receive more than 5, the damage gets exponentially worse. If you are running Data Rescue and you are running into bad blocks, please contact our support team to find the best course of action.
When a block fails and is detected by the hard drive, the drive will mark the bad block location and will no longer read or write information from that block in an attempt to limit the spread of physical damage. This will extend the life of the hard drive. While this solution will work for the first few bad blocks, it is important to note that this will not repair the physical damage; it will just try and avoid the damaged section of the drive. If you have critical data on the drive in question, it is the best practice to have a current valid backup of your drive in case you run into a data loss situation.
What Sets Drive Genius Apart?
If you are using Disk Utility or any other tool to scan your drive for bad blocks or sectors it is important to realize how these scans work. With most tools, including Apple’s Disk Utility, when you select to do a physical scan of your drive only a few blocks will be selected to scan. If these blocks come back healthy, the software makes the assumption that the entire drive is healthy. These types of scans are not going to be able to give you an accurate assessment of your drive since the entire drive was not scanned.
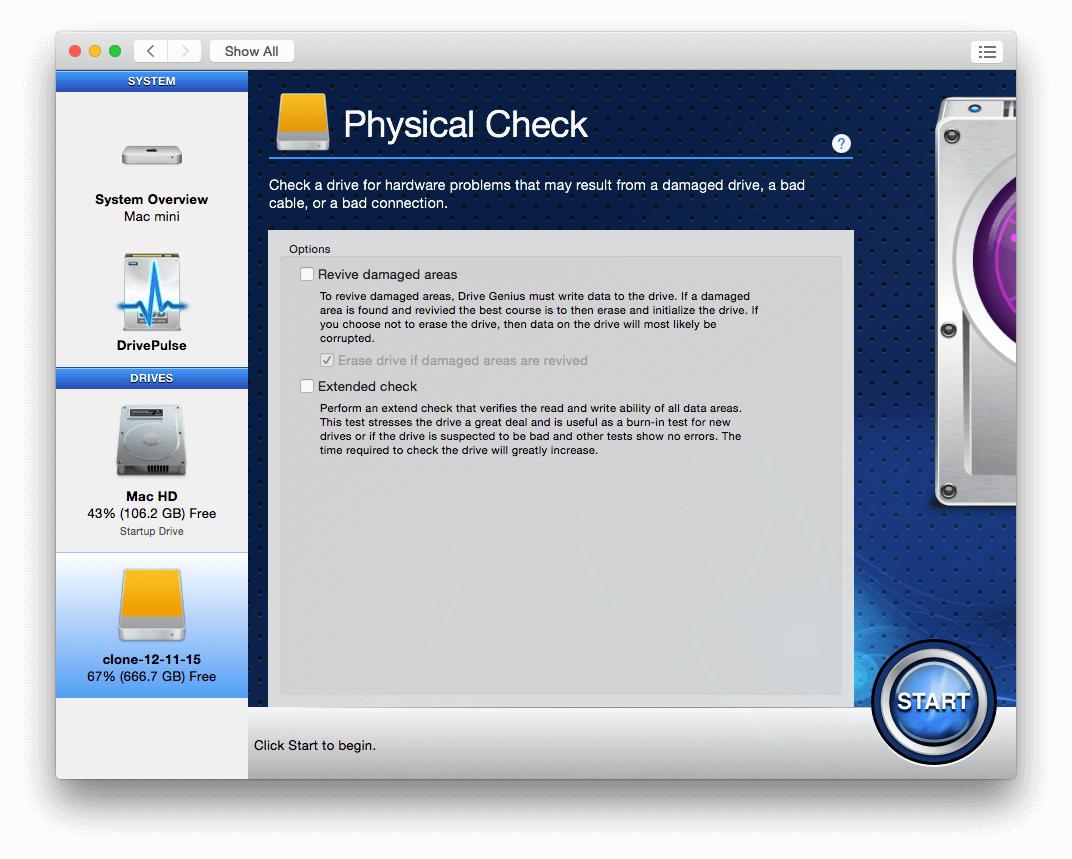
The reason behind not scanning the entire drive is due to the length of the scan. If you were to read from every single block on your hard drive, you should expect the scan to be running for around 6-8 hours. Within Drive Genius you can run this physical check by opening the Drive Genius software, highlight the drive you wish to scan on the left hand column, then select the Physical Check Icon from within the Protect section.
You will notice when you open the Physical Check Feature that you are presented with a few options:
The first checkbox is to Revive Damaged Areas. This scan will attempt to nullify the damage on the drive by writing over the damaged areas. If the software can then read the information it wrote to the damaged section it will consider the block revived. This scan should only be used if you are trying to physically restore a drive and you are not concerned with the data on the drive, as this scan may corrupt your data.
The second option is the Extended Check; this is the check that is run within Drive Pulse by default when your computer is in idle mode. If you were to start an extended physical check within Drive Genius onto a 1TB hard drive you would expect the scan to run for multiple days, up to a week in time. This scan will write and read data to every single one of the billions of blocks to ensure that every single block is in working order, rather that just looking at a snapshot of the drive.
If you have the time to let the Extended check complete, it will find faults within the drive even when other tests, other utilities, or vendors themselves declare the drive to be in good condition. And if you don’t already have DriveGenius, check out our blog about the added benefits of this software versus Apple’s Disk Utility.
Please note: due to the stress placed on a drive with the Extended Check option enabled, it is not recommended for SSD drives (and is therefore not enabled within DrivePulse for SSDs).
How Will I Know I Need to Do a Physical Check?
If you periodically leave your computer sitting in idle mode with Drive Genius installed, you should not have to worry about scanning your drive for bad blocks: Drive Pulse will take care of all of the scanning for you. Just keep an eye on the Drive Pulse icon that is on the top right hand corner of your screen, this icon is color-coded and will be red if there is an issue that requires immediate action.
If you check none of the boxes and click Start on the bottom right hand corner you are going to be running just a standard physical check. Physical Check reads every data area on a drive in sequence and determines whether the drive reports an error for any of these reads.
The Physical Check options offered in Drive Genius are going to give the most accurate assessment of a drive’s current health, as they are some of the most robust scanning tools available.
How Can I Help Prevent Physical Damage to My Drives?
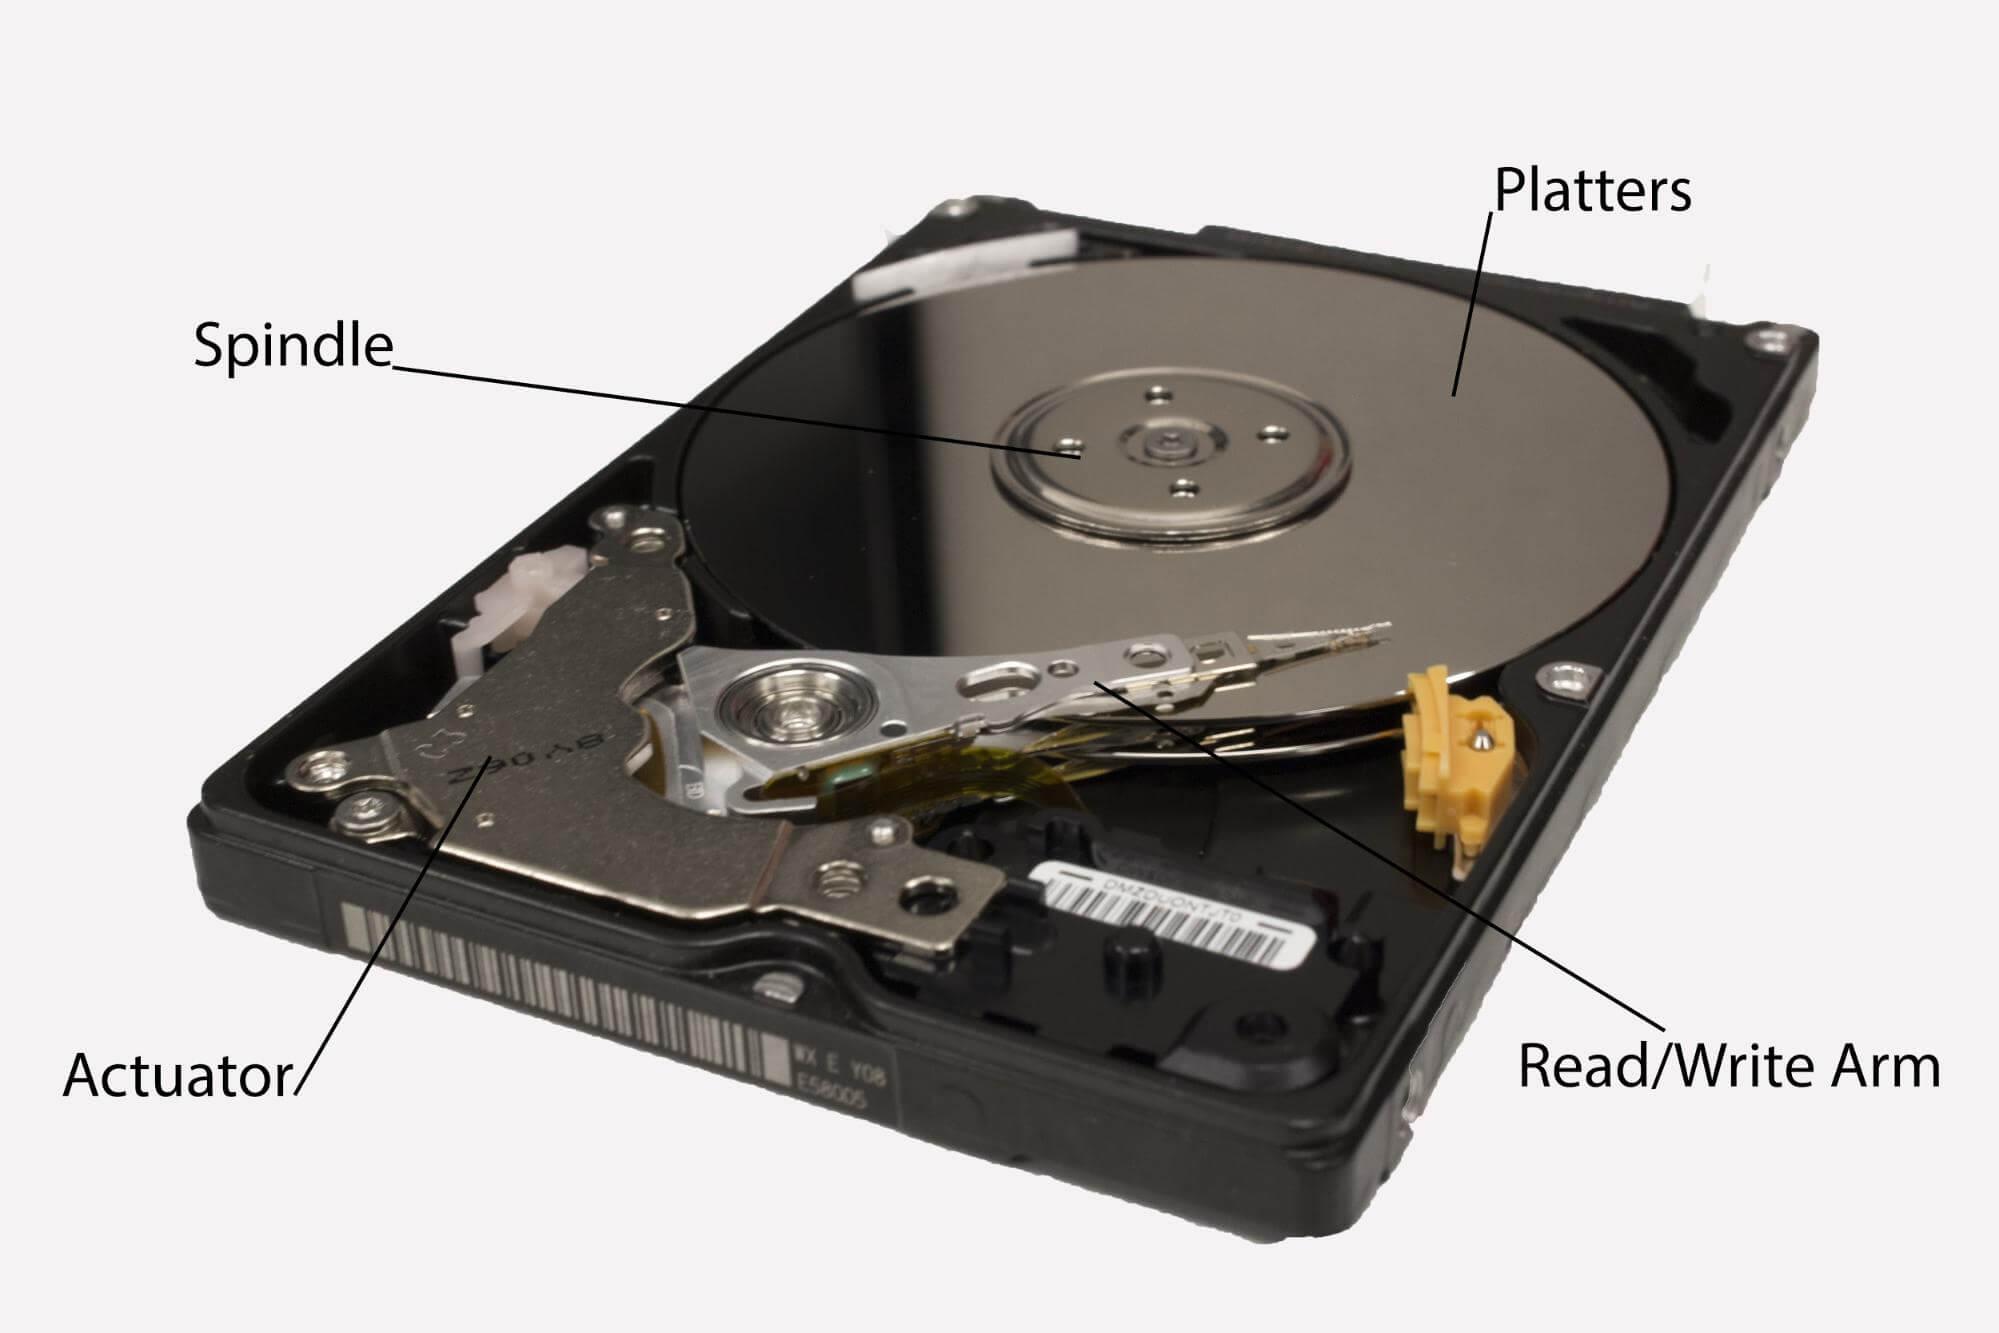
When trying to understand how to prevent damage from happening to your hard drive it is important to know the inner workings of a hard drive.
When you expose the inside it becomes a little easier to understand what is going on inside your drive.
The most important part of the components are the platters, where your data is physically stored. Depending on the size of your hard drive you will have a different amount of platters but the most common is 3 platters. Each of these platters holds data on both sides of the disk; the data is read off of the disk by the Read/Write Arm, which also writes information to your drive. Rotational hard drives currently come in two speeds: either 5400 RPM (Rotations Per Minute) or 7400 RPM.
At the end of the Read/Write Heads there are magnets, which either read or write data to the drive. The magnets at the end of the Read/Write Head hover about 1/10 the thickness of a strand of hair from your drive – they sit unbelievably close. If these magnets come into contact with the platters as they are spinning they will potentially scratch the drive, or damage the magnets. If either the magnets or platter are damaged, they will progressively become worse and worse until the read/write head becomes so mangled it prevents the drive from spinning at all.
The actuator contains a very powerful magnet that is used to move the Read/Write Head across the platters to read your data.
With the microscopic nature of the inner workings of a hard drive, it doesn’t take much to damage these drives. Even walking around with your laptop while it is turned on could potentially damage your drive; each step you take will be enough turbulence within the drive to damage the platter surface.
The best way to prevent any physical issues on your hard drives is to keep your computer or hard drive stationary while it is in use. If you need to move your hard drive or computer to a new location, please make sure to power off the computer so that the hard drive can power down before moving the device. As minor as this may seem, this will help protect your hard drive from running into physical problems.
Hard drives are designed to last anywhere from 3-5 years depending on the type of hard drive you have. While continual upkeep of your drives will help keep your data safe, replacing aging drives will also help keep your data secure.
About the Author
Matt W.
My name is Matthew and I am a Technical Support Representative for Prosoft Engineering as well as our sister company, The Data Rescue Center. I am a people person and it is my passion to help others successfully use, and maximize the potential of their hardware and software.