Drive Recovery After Reinstalling macOS X
Drive Recovery After Reinstalling macOS
One of the most common recovery scenarios that ends up in front of our support team is when a user reinstalls their operating system onto their main hard drive. This normally occurs when a user is trying to fix an issue on their Mac and they come across a support thread of someone suggesting to fully reinstall their operating system to resolve their issues.
For most minor issues with the macOS, a simple reinstall is usually the go-to resolution from an Apple Tech; mainly because it is very simple and efficient for resolving issues. While this does make repairing a Mac easier in some cases, it also causes users to perform this step believing they are repairing their computer only to be left deleting every file and folder on their system.
When you reinstall your operating system on your Mac, all of your previous information (files, folders, pictures, and videos) will all be erased. Once the new OS install is completed you will be left with what looks like a fresh, brand new system. In this situation the reinstall will erase your File Allocation Table, which is essentially the equivalent of a phone book where all the files are located on your drive. When the File Allocation Table is erased, your files are still present on the drive, there is just no longer a table that tells your computer where all these files are located.
Your information will stay present on the drive until it is overwritten by new information being saved to the drive; this is why it is imperative that you do not save any files onto the drive you need to recover your data from. If the drive that you lost your data from is the main drive of your computer, you will want to keep your computer usage to a minimum. Even an activity as simple as browsing the internet will save cache files to your system which will start to overwrite the already missing data.
In this situation, the safest way to perform the recovery is going to be from using a Data Rescue Recovery Drive or Target Disk Mode if you have another Mac available for the recovery.
If you do not have a Recovery Drive created, or another computer to perform the recovery from, you can still recover your data by installing Data Rescue onto the computer with data loss. While this install does run the risk of overwriting a few files, the majority of your files should still be recoverable. We recommend running the demo of Data Rescue to determine if your files are recoverable before moving forward with the purchase. The Demo has the full capabilities of the scan engine and will show you every file that can be recovered by the software.
Installing the Data Rescue Demo
To install the demo of Data Rescue you will want to visit the Downloads tab on the Prosoft Website and select Data Rescue 5 Mac (requires macOS 10.10 or later. If you are running an earlier version of macOS please visit our legacy Data Rescue Page). Enter your email address and select download. You should immediately receive an email with a download link, as well as a serial number for the demo of the software. Click the download link within the email and copy your serial number so you can paste it into the activation window once the software has been installed.
Data Rescue installs a bit different from most software, as it tries to take up the least amount of drive space as possible, to limit the amount of files it may be saved on top of. When you click save file, Data Rescue will install only into your downloads folder, it will not be within the applications folder. Once you have located the installed file in the Downloads folder you will receive this dialog box:
Double-click on the plus sign logo to open Data Rescue.
Select ‘Open’ on the bottom Right.
And Agree to the License Agreement.
You will then be prompted to enter your serial number, followed by your Username and Password.
Starting Your Scan
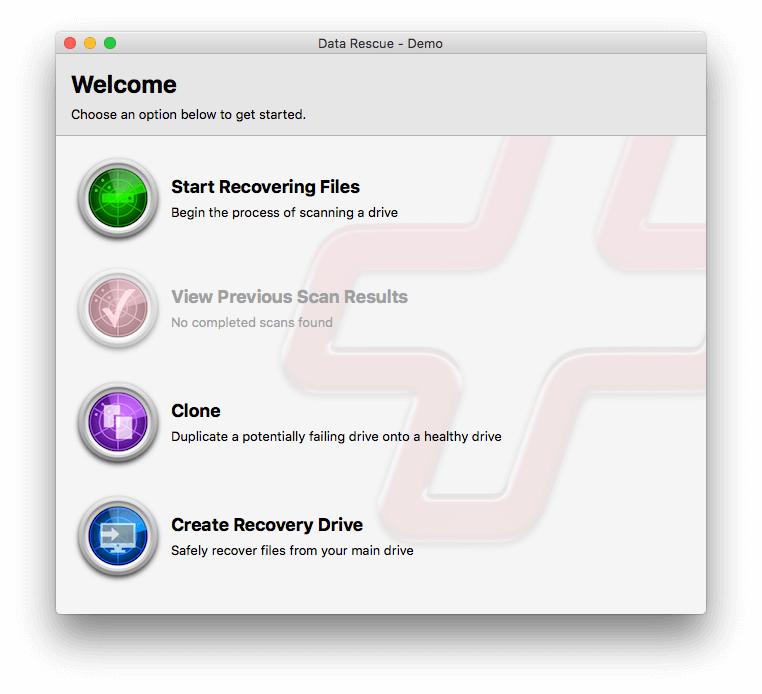
Once your serial number has been entered you will be presented with the Data Rescue Welcome Page, which by default will have 4 options. To begin your recovery simply select “Start Recovering Files”.
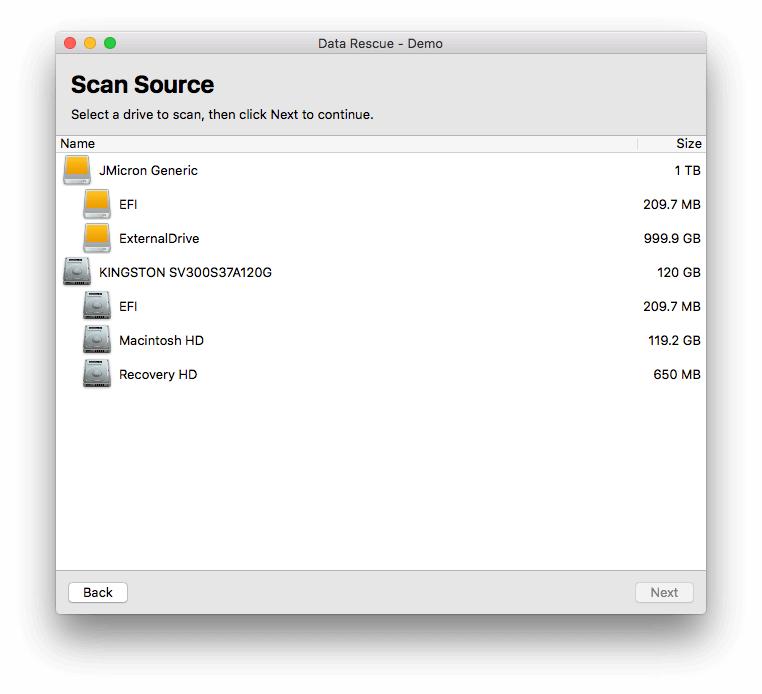
The Source Window is going to show all the drives and volumes that are connected to your system. Even if a drive is not showing on your desktop or within Disk Utility, Data Rescue may still be able to access the drive to perform your file recovery.
In the screenshot above, the drive with the grey icon is the main internal drive of my Mac. The physical hard drive I have in the computer is a Kingston, while the name of the volume is Macintosh HD.
Note: The internal drive will always show with the grey icon, while any externally attached drives will display with yellow icons.
Scanning the physical name of the drive will always return more scan results as this will scan all of the Volumes within the drive as well as all of the free space on the drive. If you were to select just a single volume, only the selected volume would be scanned, and the free space (which contains deleted files) may be overlooked.
When you have highlighted the drive you need to recover your data from, select Next on the bottom right hand corner.
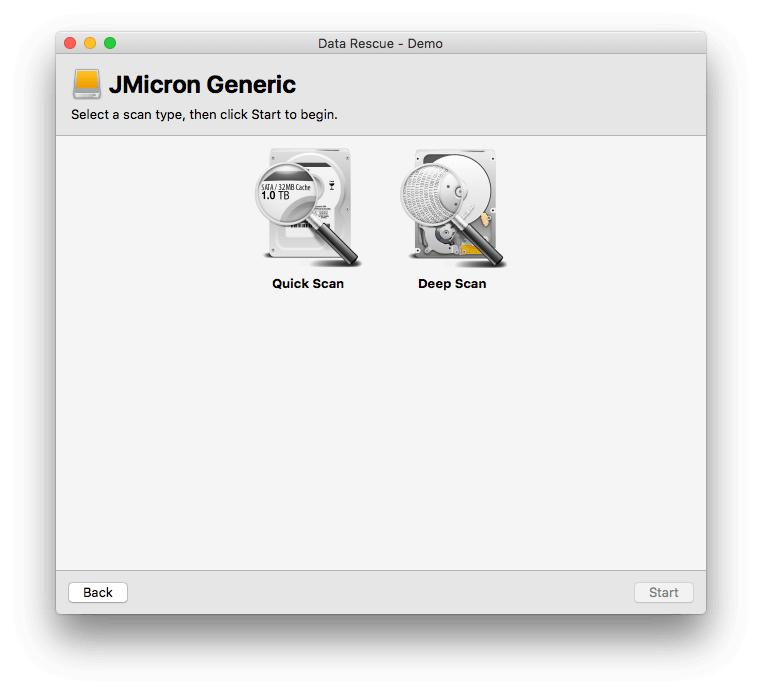
The following window will ask you to select the type of scan you would like to run. If you click on any of the scan types they will give a brief description on how the scans operate. Which scan you should run is going to come down to your individual data loss situation, if you are unsure on which method to try we suggest contacting our support team.
Here’s a quick summary on when you would use these different scans:
A Quick Scan is the fastest scan that can be run, and is meant to be used if your hard drive is no longer mounting to your system.
The Deep Scan is the most robust scan within the software, and will take the most amount of time to run, however it will create the most comprehensive list of recovered files.
The Deleted File Scan will check your drive’s free space; this is a location that the hard drive recognizes as empty space where information can be written to. When you delete a file, the space that file sits on is now considered free. This scan should be used if you have deleted a file by mistake, and no new information has been saved to the drive.
The Clone option in Data Rescue is available on the main menu of the software, and unlike the clone you would find in a backup software; this Clone was designed to help recover from drives that are beginning to physically fail. The clone will make an identical copy of your drive, including the empty space, which will then need to be scanned using a Deep Scan to retrieve the usable files.
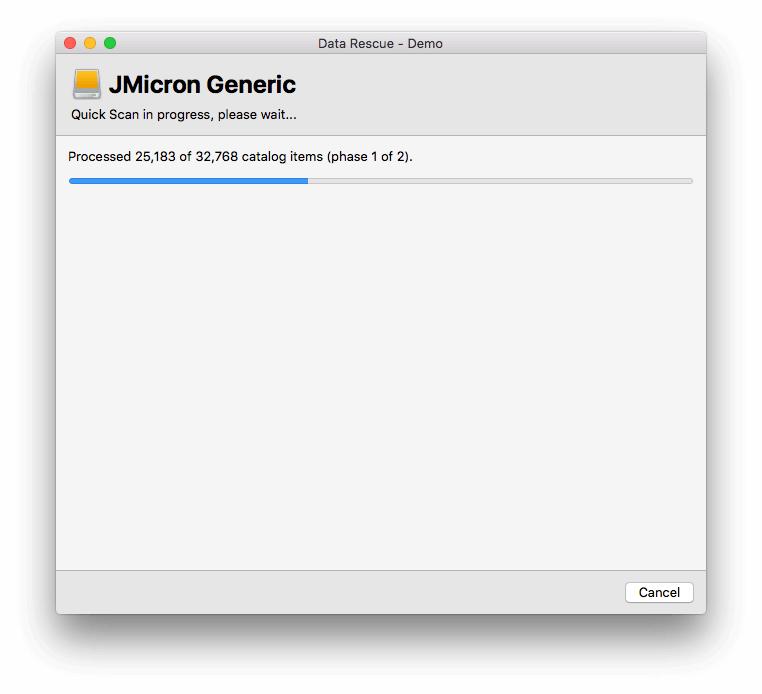
Once you have been able to select the scan you need to run for your situation, you will just need to click Start in the bottom right hand corner.
Whichever scan you selected will appear at the top of the screen and you will see a blue bar going across your screen.
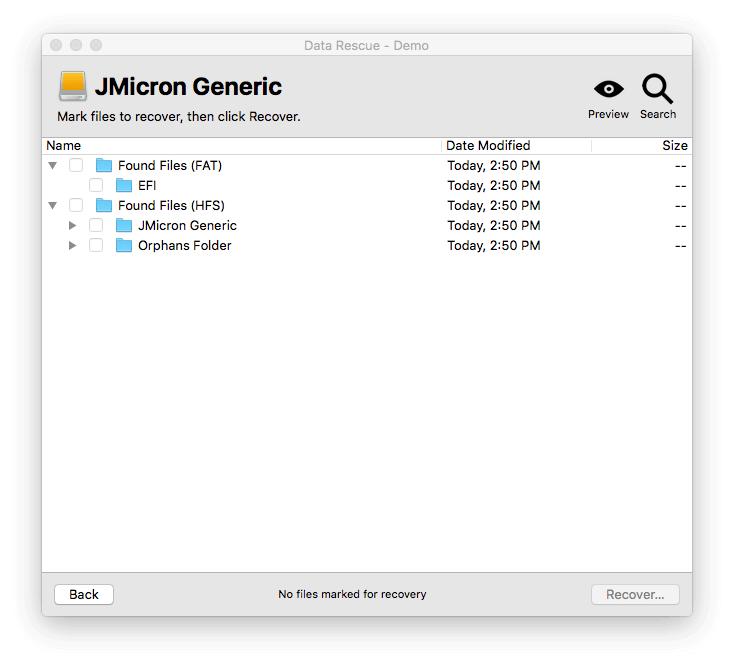
When your scan is completed you will be shown the scan results. Depending on the type of scan you ran, you may have a Found Files Folder as well as a Reconstructed Files Folder.
Always Preview Your Recovered Files!
It is important to note that file names can become disconnected from the contents of a file itself, this will make the file appear in its original location, however the file will not open. This is why we highly recommend you use the preview feature within the Demo to make sure your files are recoverable before you purchase the software. If you see the names of your files, but the previews of the files will not open you will want to check through the Reconstructed Files Folder to see if the files were found without their original file name.
If you happen to reinstall your operating system without having a valid backup of your files they are not gone forever. Your data will stay present on your hard drive until new information is saved on top. The best practice is to keep computer usage to a minimum until you have the time to run a recovery on the drive.
About the Author
Matt W.
My name is Matthew and I am a Technical Support Representative for Prosoft Engineering as well as our sister company, The Data Rescue Center. I am a people person and it is my passion to help others successfully use, and maximize the potential of their hardware and software.