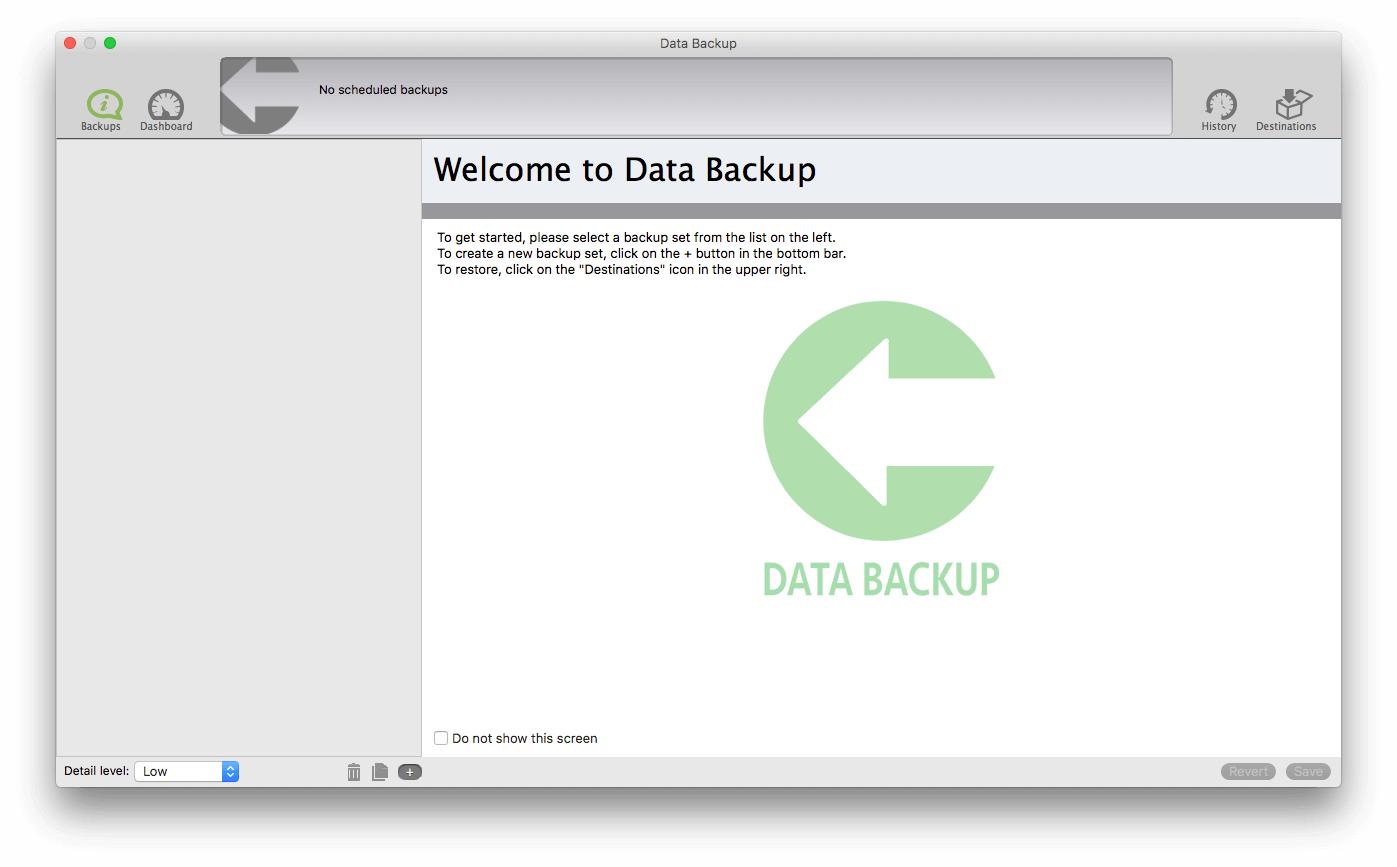
Creating a Bootable Clone of Your Computer

There are many benefits that come with making a bootable clone of your computer, and it is my preferred method of backing up a hard drive. When creating a cloned drive, all of the contents on the source hard drive will be copied to the destination drive. A bootable drive refers to the boot contents; i.e the operating system that is installed on the drive that allows you to start your computer and perform tasks.
The startup drive in your computer is usually the main drive that will contain an operating system making the drive bootable. If your hard drive is not bootable, then it is just merely a storage drive. You can create a bootable clone of any hard drive that is already bootable. If the hard drive that you are cloning does not have an operating system, then only the file contents will be copied to the destination.
When creating a clone, all data on the destination drive will be erased and overwritten with the new contents. It is impossible to make a hard drive bootable without reformatting and erasing the drive.
Why Make a Bootable Clone
Having a bootable clone of your main drive is a safe and reliable option for a backup. I would always recommend having a clone of your startup drive in case of a data disaster or hard drive failure. If you are experiencing any symptoms of hard drive failure, having a copy of your hard drive is the fastest way to fix the problem and minimize lost time on the computer.
Your computer does not warn you when the hard drive will fail, but may give you indications of impending failure. If you are familiar with the signs and symptoms of drive failure, then you will be one step ahead of data loss.
For Mac users, software can help determine the risk of a failing drive. The disk utility software, Drive Genius, will be able to give you the best analysis of your hard drive’s functionality. Even this software cannot completely determine when a hard drive will fail, but will warn you before the failure so that you can clone your hard drive without losing data. The Drive Genius software has a clone utility that you can use to create a bootable clone of your computer.
Creating a Bootable Clone Using Drive Genius
Drive Genius is a disk utility software only available for Mac computers. Drive Genius features optimize your hard drive and warn you of impending drive failure. Drive Genius also has a great cloning tool that will be able to copy everything from the source drive, including the boot contents.
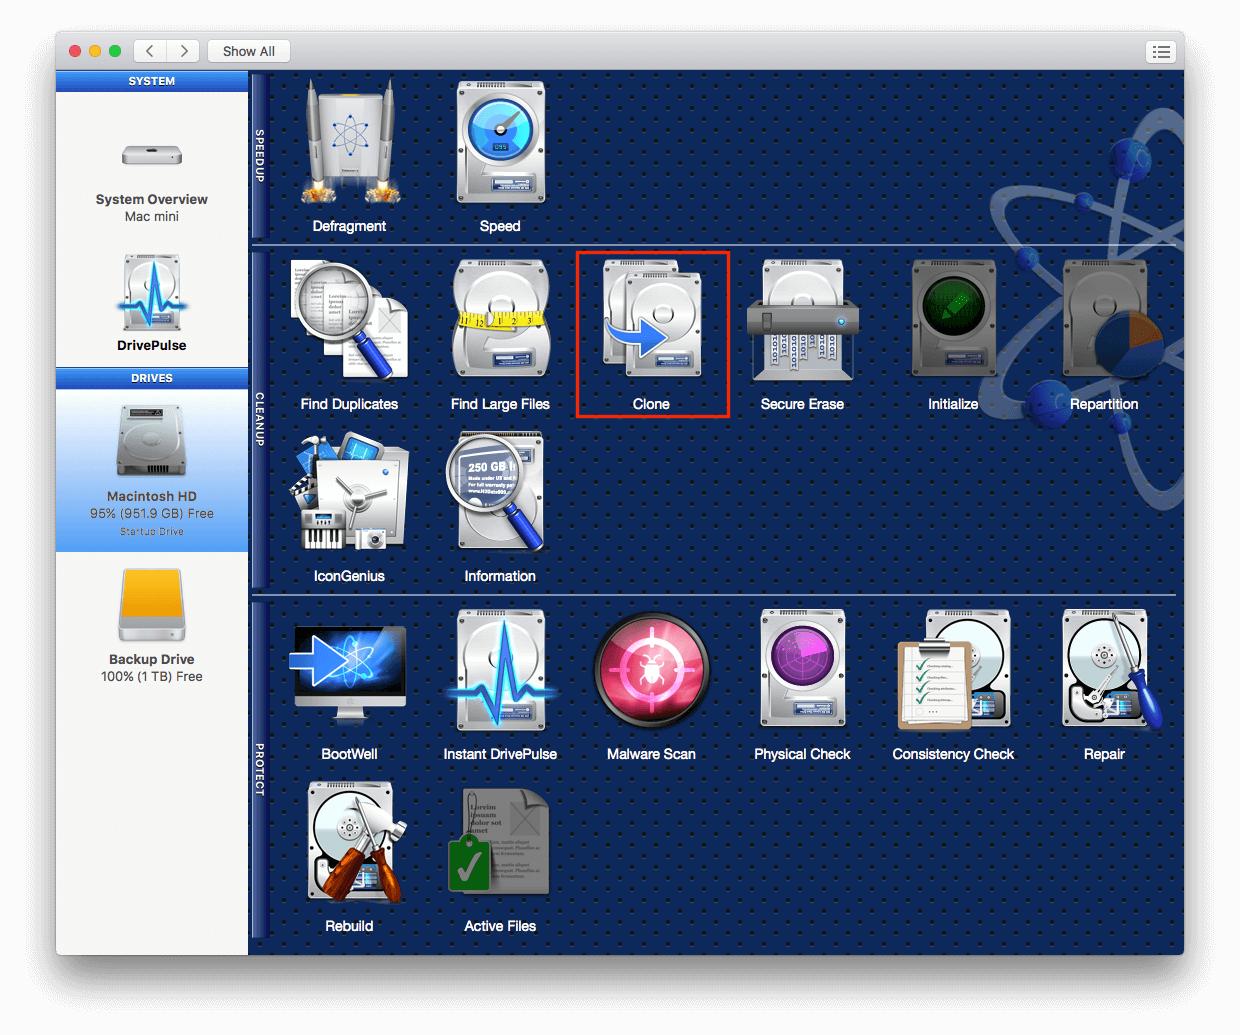
The clone tool in Drive Genius has a simple guided process that I will explain. In order to clone your source drive to another hard drive, the destination drive will need the same amount of storage space or larger. Since my internal drive on my computer is 1TB, I will need another secondary drive with at least 1TB of storage space. First, you will want to have the source drive that you are cloning selected on the left side of the software under ‘Drives’.
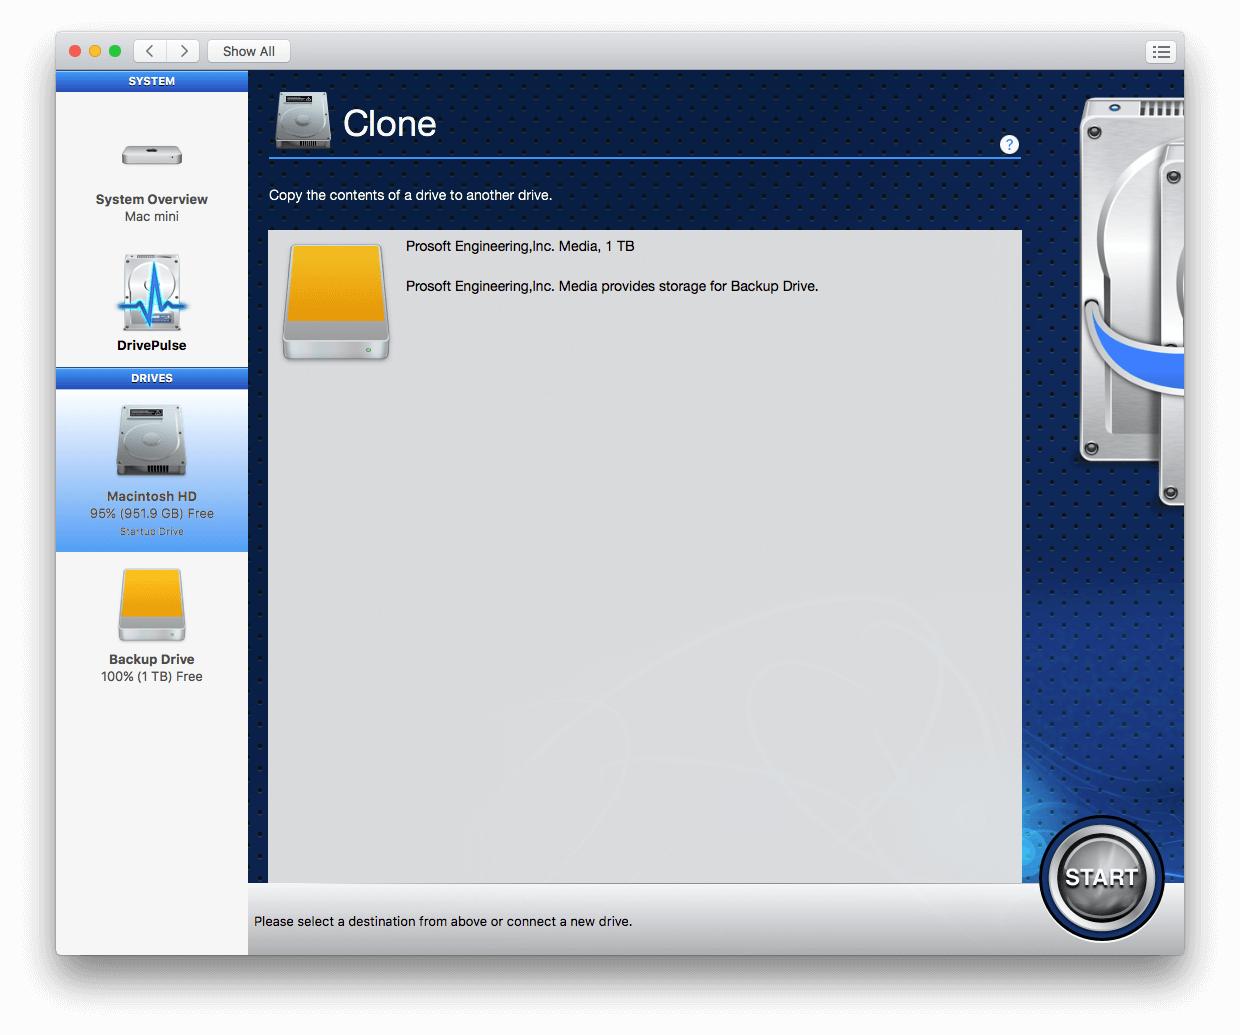
After selecting the clone tool, the software will look similar to the above screenshot. It is important that you have the source drive selected under ‘Drives’ and you will see the destination drive available to select in the main window.
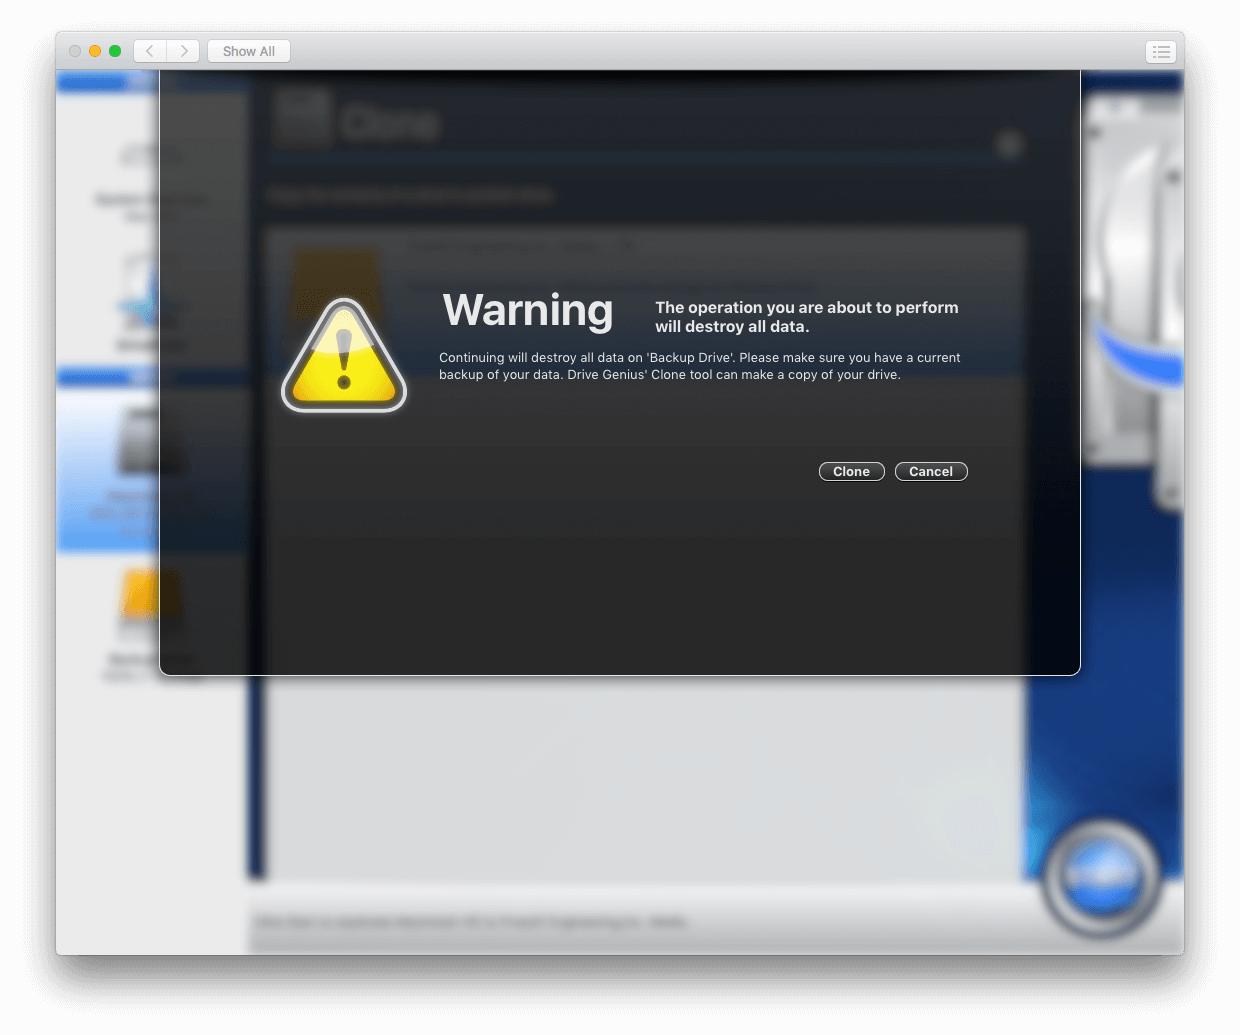
Once you highlight the destination drive to clone and select ‘Start’, you will see a warning pop-up as shown above. This warning will let you know that the cloning process will destroy all data on the destination drive since it is going to be overwritten with the data on the source drive. Once you select ‘Clone’, the process can not be reversed. I would recommend allowing enough time for the clone to finish. Cloning a 1TB drive to another 1TB drive would take around 4-6 hours, or more depending on the amount of data stored on the drive.
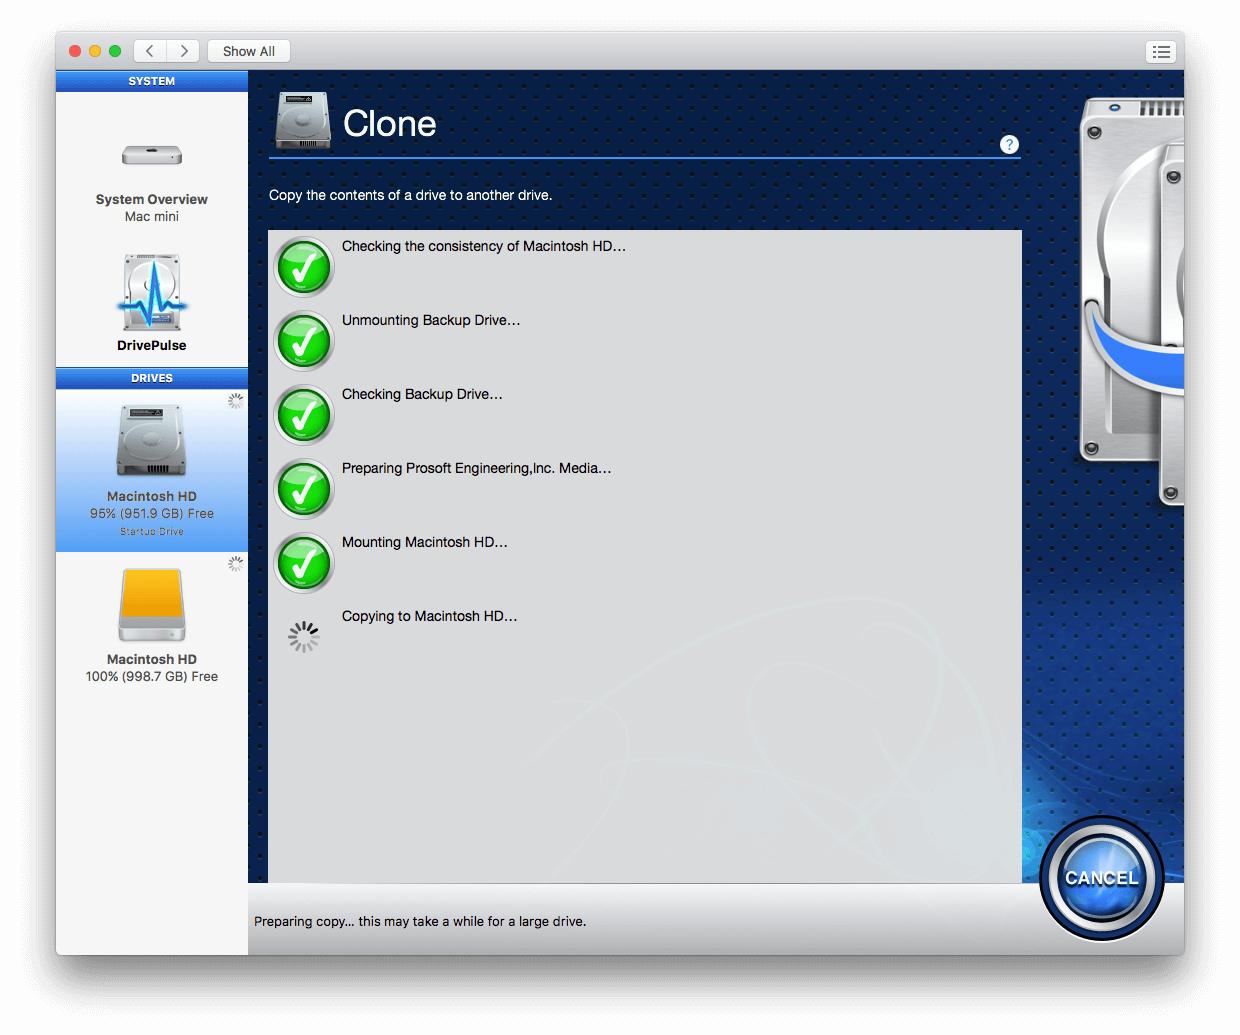
During the cloning process you will see the progress similar to what is shown above. The first few checks typically finish within 5-15 minutes before the software will start copying data over. You will notice that the software will label the drive that you are copying the data to the same as the source drive.
I do not recommend cancelling the clone, since this could potentially affect the destination drive and how it operates.
Note: To make sure that you are copying the data from the correct source drive to the correct destination drive, you will see the source drive highlighted on the left side and the destination drive will not be highlighted.
Once the copying is complete, the clone will finish and you will be able to use or store your new backup copy of your main drive.
Creating a Bootable Clone Using Data Backup
With a reliable backup software, you will never have to stress during a data loss emergency. Unfortunately, all forms of data storage will eventually fail and lose any data that was stored. You can prevent losing important files from your computer by having regular backups stored on a secondary drive.
Data Backup is our backup software that you can use to clone a drive on both Windows and Mac computers. I will show you below the steps for creating a clone backup set in Data Backup. The process will be the same if you are running Data Backup on a Mac or Windows computer.
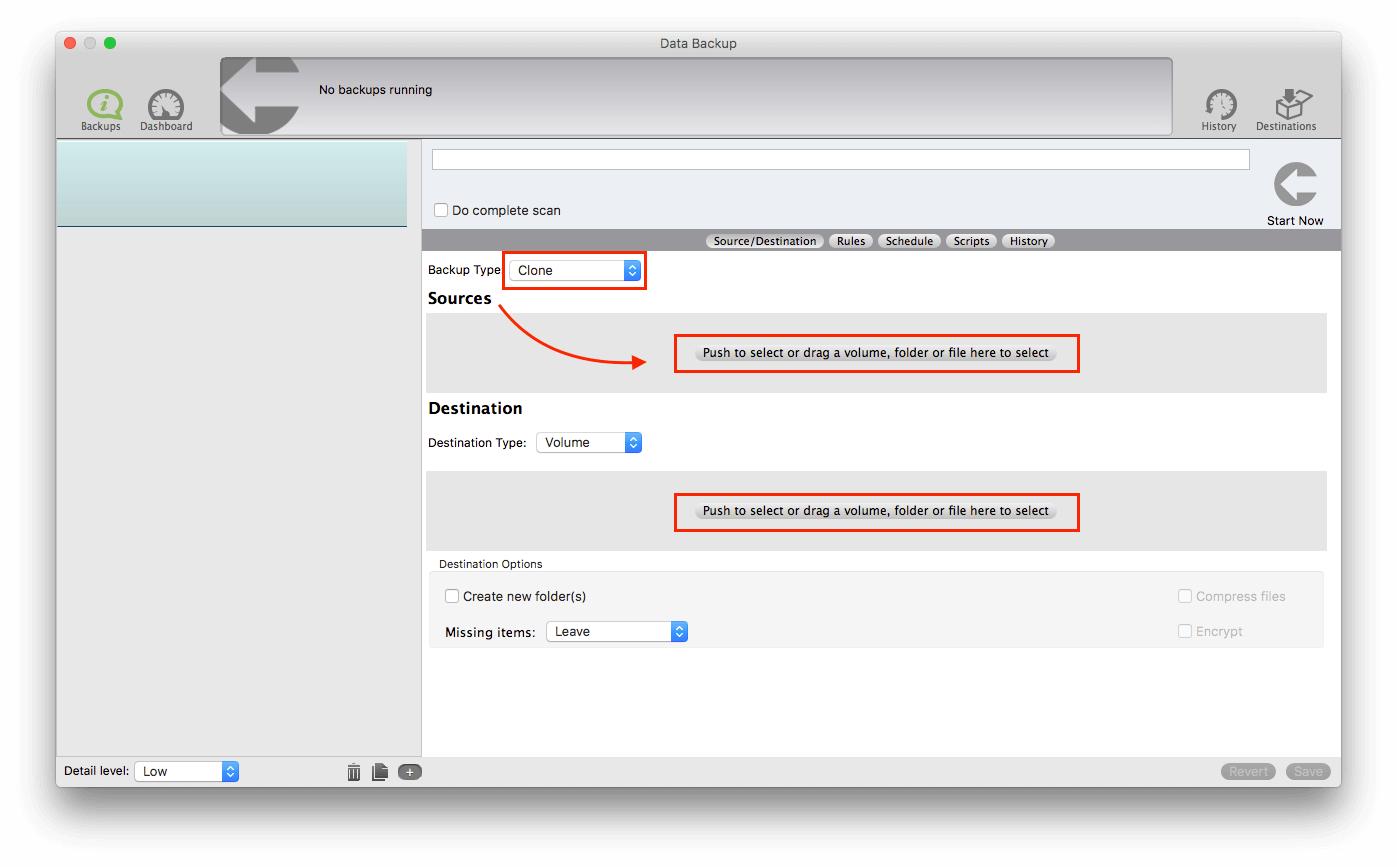
Upon opening Data Backup, you will be able to make a clone backup by creating a new backup set. If you have not already created a new backup set, you can select the ‘+’ icon on the bottom left of the software. You will now be presented with the same screen as shown above in the screenshot. The items that are boxed red are the only preferences you will need to change.
First, you will want to make sure that the backup type you have selected is the clone. Once you have the backup type selected, you will need to choose the source drive. I found the easiest way is to click the button to select the drive, rather than drag and drop. A new window will appear for you to choose the volume, folder, or file from your hard drive.
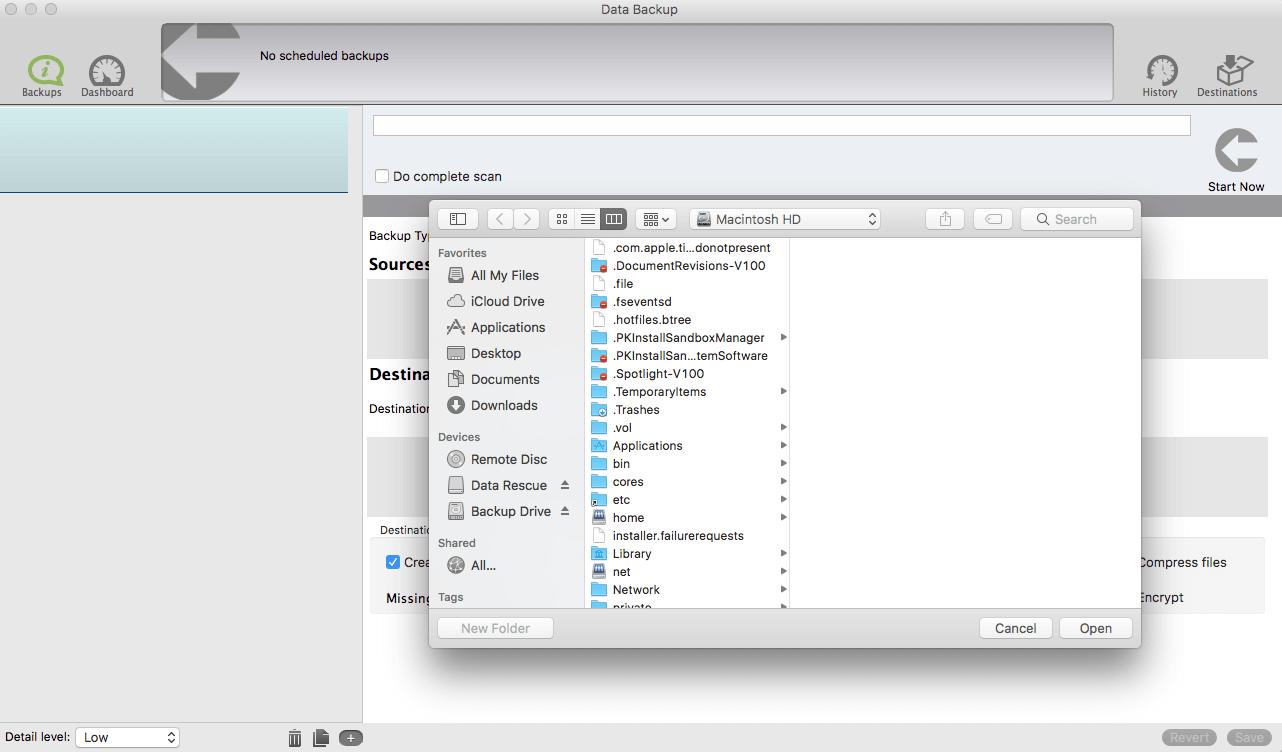
Mac users can reference the image above when choosing the volume of your source drive. In order to select the entire source volume, you will want to just select ‘Open’. Make sure you are looking at the correct drive you want to clone. The drive is shown at the top of the new window, which has a drop-down menu to choose from other drives connected to the computer.
To select the destination drive, you will click the button under destination to add the volume and then choose from the devices on the left side of the window to choose the correct destination drive. Once you have the hard drive highlighted, you can choose ‘Open’ to select the entire volume of the destination drive.
After you have chosen the source and destination drive for the clone backup, you can choose to save the backup set and then select the ‘Start Now’ button at the top right of the software. One of the benefits that you get with using Data Backup software to clone your drive is that you will also be able to use a variety of features in the software, such as text and email notifications.
Why Use Data Backup?
Data Backup is a great backup software for users that do not like to pay a lot of attention to how or when their backups run. With email and text notifications for both Windows and Mac computers, you can be alerted when your backup finishes and details of the backup. This backup software also allows for more customization as far as when your backup will run and provide you with backup history so you can feel safe knowing all your files are backed up.
About the Author
Matt T.
My name is Matt and I work alongside the technical support team at Prosoft Engineering to provide friendly customer support for anyone using our software. I am also a customer service representative for their sister company, The Data Rescue Center. I enjoy helping others and strive to inform users on how to keep their files safe and maintain performance for their computer.