Using the Recovery Partition to Recover a Non-Booting MacBook Air
I have helped a few users with a MacBook Air that was no longer booting. This was due to a logical issue (corrupted directory) with their internal HD Main Boot drive. Most of them did not have their data backed up, and they wanted to use Data Rescue Mac Recovery Software to recover the files from the drive before attempting to reinstall macOS. Even though the MacBook Air was not booting from the main hard drive Mac HD, there was an alternative method for using the application Data Rescue.
The first step was to help guide them to boot into the recovery partition and then install macOS to an external USB drive. Once the install was complete, the external drive was bootable. The next step was to help them download and install Data Rescue to that newly created bootable hard drive. Once that was finished, they were able to use that drive to boot up from the MacBook Air, run Data Rescue from it, and scan the main HD on the MacBook Air. When Data Rescue was done scanning the internal drive, most users were able to recover all of their files and copy the files from the problem drive over to the newly-created USB external drive.
Even though there have been many recoveries with Data Rescue software, there are still some instances that would result in unrecoverable data. People that have permanently deleted their files usually experience this because they continue to use the computer and then run the recovery later on. Continued use of the computer will cause more information to be written to the drive and could overwrite the deleted data. If the computer or hard drive has suffered physical damage or you hear clicking or scratching noises from the drive, then you will want to turn the drive off and look into physical data recovery services. If you need more information about physical data recovery services, please contact The Data Rescue Center.
What Is the Recovery Partition?
The recovery partition is a feature that allows you to restore system software to your Mac without having a DVD drive. If you are experiencing issues with your main hard drive not booting correctly, the recovery partition will allow you to repair, erase, and install a new copy of your OS X. To recover your files using Data Rescue, you would use this to create the macOS on a separate drive (often referred to as the secondary startup drive), so you do not erase all of your data on the main hard drive. The recovery partition will connect to Apple’s servers to download the operating system on the hard drive of your choice. If you are not sure which drive to choose for the secondary start up drive, please contact our support team.
There are also some other handy features that the recovery partition can do such as restore your Mac from a time machine backup or connect to the internet. Every Mac drive will already have this partition installed to allow you to run these key features.
How to Access Recovery Partition
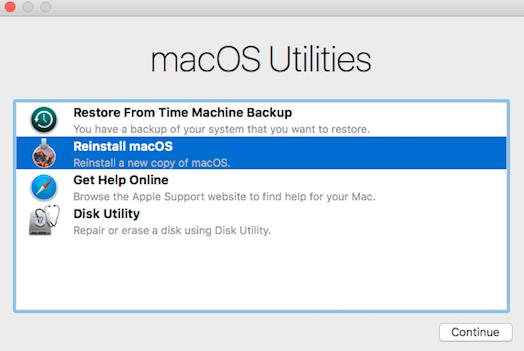
If your computer is not able to boot into the main hard drive, you still may be able to access the recovery partition that is already installed on the drive. There are a couple different ways that you can access the recovery partition. The method that is more commonly used would be to restart your Mac, then hold the Command+R keys on your keyboard until you see the recovery partition screen like the picture below. You will want to select the Reinstall Mac OS option, so that it can write the Mac operating system to a new drive.
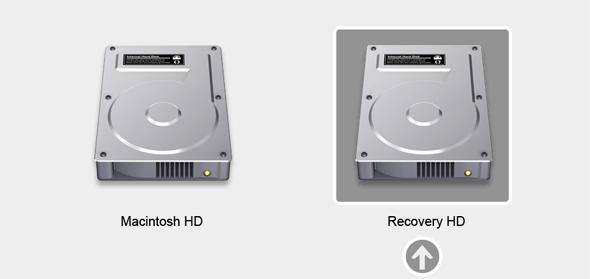
If you are not able to access the recovery partition with the method above you can try to run the option boot. This is similar to the first method in which you need to restart your computer. As your computer is starting, you will want to hold the “option” key on your keyboard until you see a list of drives connected to your computer similar to the image above. You would then use the arrow keys to select the Recovery HD drive and hit “enter.” This will bring you to the Recovery Partition shown earlier where you will select Reinstall Mac OS to create a new drive running the Mac operating system.
Using Recovery Partition to Create macOS on New Drive
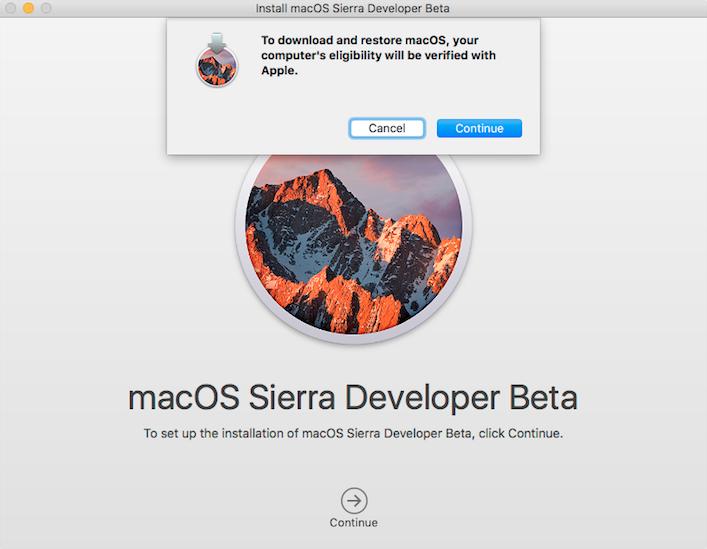
Now that you have accessed the recovery partition, you can use the Reinstall macOS option to install the operating system onto a flash drive or external drive connected via USB. To install the macOS, I would recommend using a USB 3.0 flash drive with at least 32GB of data, so that you are using a large enough drive to run the install. You may want to get a drive that can hold the amount of data stored on your internal drive as well as the operating system, since you will need to recover the data to a separate drive. Once you select Reinstall macOS, you will be directed through a series of prompts like in the picture below that will verify the process. Continue through the prompts and agree to the terms of the software license agreement. Once you have agreed to the terms, you will be selecting the drive to install the macOS.
Selecting Drive to Install OS X
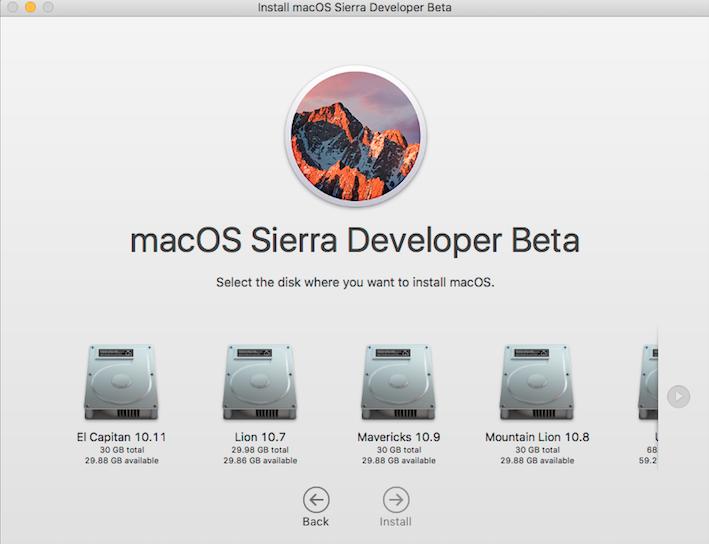
Now that your new drive is plugged into the computer and you have reached the window shown below, it’s time to install the operating system. In the picture there are multiple drives shown with different macOS versions. Make sure that you are selecting the correct drive by verifying the name and format. Once you have selected the drive and clicked “install,” a window will pop up that requires your Apple ID and password to continue. Once you have entered in the information, the install will begin.
Booting into Newly Created OS X Drive
You’re almost ready to start your scan! Now that you have installed the macOS on a different hard drive, you can boot into the drive and install Data Rescue. To do this, you will need to restart your computer and run the “option boot.” Once the computer is powering on, hold down the “option” key until you see a list of drives containing your non-booting MacBook Air drive and the newly created OS X drive. Use the arrow keys to select the newly created drive and hit the “enter” key.
Once you have booted into the external drive, you can download Data Rescue for Mac. When the download has finished and you have activated the software with your serial number, you are ready to start a scan on the non-booting MacBook Air. Check out the next section for more information on running the scan with Data Rescue for Mac.
Starting a Scan of Internal Drive
This is the moment where you find out if your non-booting Macbook Air drive can be scanned with Data Rescue. Once you have launched Data Rescue you will see three options: start recovering files, resume recovering files, and create bootwell drive. You will want to select “start recovering files”. If you see the Macintosh HD drive that is associated with your non-booting MacBook Air drive, select that and click the next button. The non-booting drive would have to be sent to a physical data recovery center if the software will not display the drive to scan.
Now that you have selected the internal Macbook Air drive, you have four options: a quick scan, deep scan, deleted files scan, or make a clone of the drive. I would suggest starting the deep scan as this will combine the results of both the quick scan and deleted files scan.
Once you have selected the deep scan, you may need to choose your newly created OS X external drive as the temporary storage location if that has not already been selected. After choosing the temporary storage, you can start the scan.
How to Verify Results and Recovering Data
Now that your scan is finished, you may be wondering how you can view the results. Since you have chosen the deep scan option, there will be a “found files” folder and a “reconstructed files” folder. You may want to start looking in the found files folder unless you know that you are looking for a file that was deleted. The software will also allow you to preview any file by choosing the file and selecting the “eye” icon next to the search feature. You can also use the search feature to help locate files you are interested in. You can search by filename or file extension type.
The found files folder displays files from any file systems it detects, and will be able to list the original directory structure and file names. I would recommend verifying the files in the subfolders instead of checking the entire folder, since this may recover some information you would not need. You can verify the file within the preview of the software. If the preview does not display the file, that would indicate the file is corrupted and would not be recoverable.
The reconstructed files will organize any found files by category and file type. These results will not have their original directory structure and most of the time will not have their original file names, since they are found by file patterns. Deleted files or files lost due to reformatting a drive are typically found in this section.
Alternative Methods to Access Non-Booting Mac
There are some alternative methods to creating a secondary startup drive. Check out recovery drive creation to find out more information about creating a secondary startup drive using Data Rescue software. Or, if you happen to have a Firewire or Thunderbolt cable and an extra Mac, you can use Target Disk Mode to run the scan on the non-booting MacBook Air.
If you do not wish to use the Recovery Partition, I would recommend the BootWell process. This is built within the Data Rescue software and would take less time than the other methods. As long as you follow the steps and are able to run the scan on the non-booting Mac drive, then you can preview the files Data Rescue was able to locate and recover the files that you need. Sometimes the file will not be able to be previewed. This could indicate the file is corrupted and would be unrecoverable. Please contact Prosoft support if you are unsure on how to verify your results.
About the Author
Matt T.
My name is Matt and I work alongside the technical support team at Prosoft Engineering to provide friendly customer support for anyone using our software. I am also a customer service representative for their sister company, The Data Rescue Center. I enjoy helping others and strive to inform users on how to keep their files safe and maintain performance for their computer.